Posted on June 18, 2019
 by Stop Time
  0
0 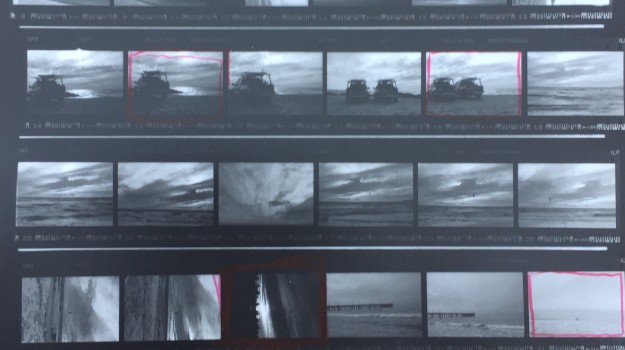
If you’re shooting film and not making proper proof contact sheets, you really should be. I’ve shot film for more than 40 years but I’ve only consistently made proper proofs for the past few. For a good while, I shot and developed my film, then scanned it and used the scans to choose and images to print in the darkroom (with the added bonus that I had the scanned images to use online).
A few years back, a Mac OS update made my Epson Perfection V750 scanner the definition of tedium to use…pausing after every single image it scans so that a roll of film can take half an hour or more to scan. Epson still haven’t fixed the problem and no doubt never will. It was at this time that I started making proper proofs and I’ve never looked back.
A proper proof not only helps you choose which images you want to use, but also tells you how good your negatives are and how easy they will be to print in the darkroom. After a one time test, proper proofs are super quick to make (faster than scanning even with a fully functioning scanner). I can proper proof ten films in about 25 minutes in the darkroom, far quicker than I could scan.
The advantages of a proper proof are:
- Provides a visual record of your entire film in one easy sheet
- Allows you to quickly find the correct negative in a sequence and come straight back to the one you’ve chosen to print
- Tells you how good your exposure and contrast control is
- Helps identify any problems in technique, processing or faults with your camera or light meter
- Very quick and easy to make
- Look pretty!
So how do you make a proper proof? Here’s the technique I use for maximum speed. It works for all formats of film and avoids the need for a specialised contact proof frame. The only downside is that you need a slightly larger piece of photo paper than the 10×8 inch size that ready made contact printing frames use:
- Gather your negatives and a clip picture frame large enough to hold a 9.5×12 inch picture as well as four bulldog clips.
- Set up your enlarger with the bellows fully closed and with no negative in place to project an even rectangle of light large enough to cover a 10×12 inch area
- Make a note of the lens, aperture, (empty) negative carrier used and exact height of the enlarger head above the baseboard as well as the contrast setting; I use 2.5…(if you’re using a colour head and Ilford paper, no filter will give a 2.5 contrast).
- Take a clear strip of the film you want to test…you’ll generally find a length of clear film leader after the end of the images when you process your film. You’ll need to test each different type of film you use as the film base density varies significantly between different films.
- I store my negatives in Kenro clear acetate negative holders and for speed make contact prints through the acetate. If doing the same, make a test strip by placing the clear film strip in an acetate holder and a strip of paper beneath.
- Test strip to the point the paper reaches absolute black. You want to get it down to the second that absolute black first appears on the strip. Once you’ve found your time you have all the information you need to quickly run off proper proofs at will.
- Note all the settings and the time and pin the information to the wall by your enlarger.
- Now to run proper proofs, simply set up the enlarger to the settings you’ve just noted, place a piece of 9.5×12 inch photo paper on the base of the clip frame, slap your acetate holder full of negatives on top, then the glass and clip tight with the bulldog clips. Place under your enlarger and set the noted height and other settings. Expose for the time you tested and process as normal.
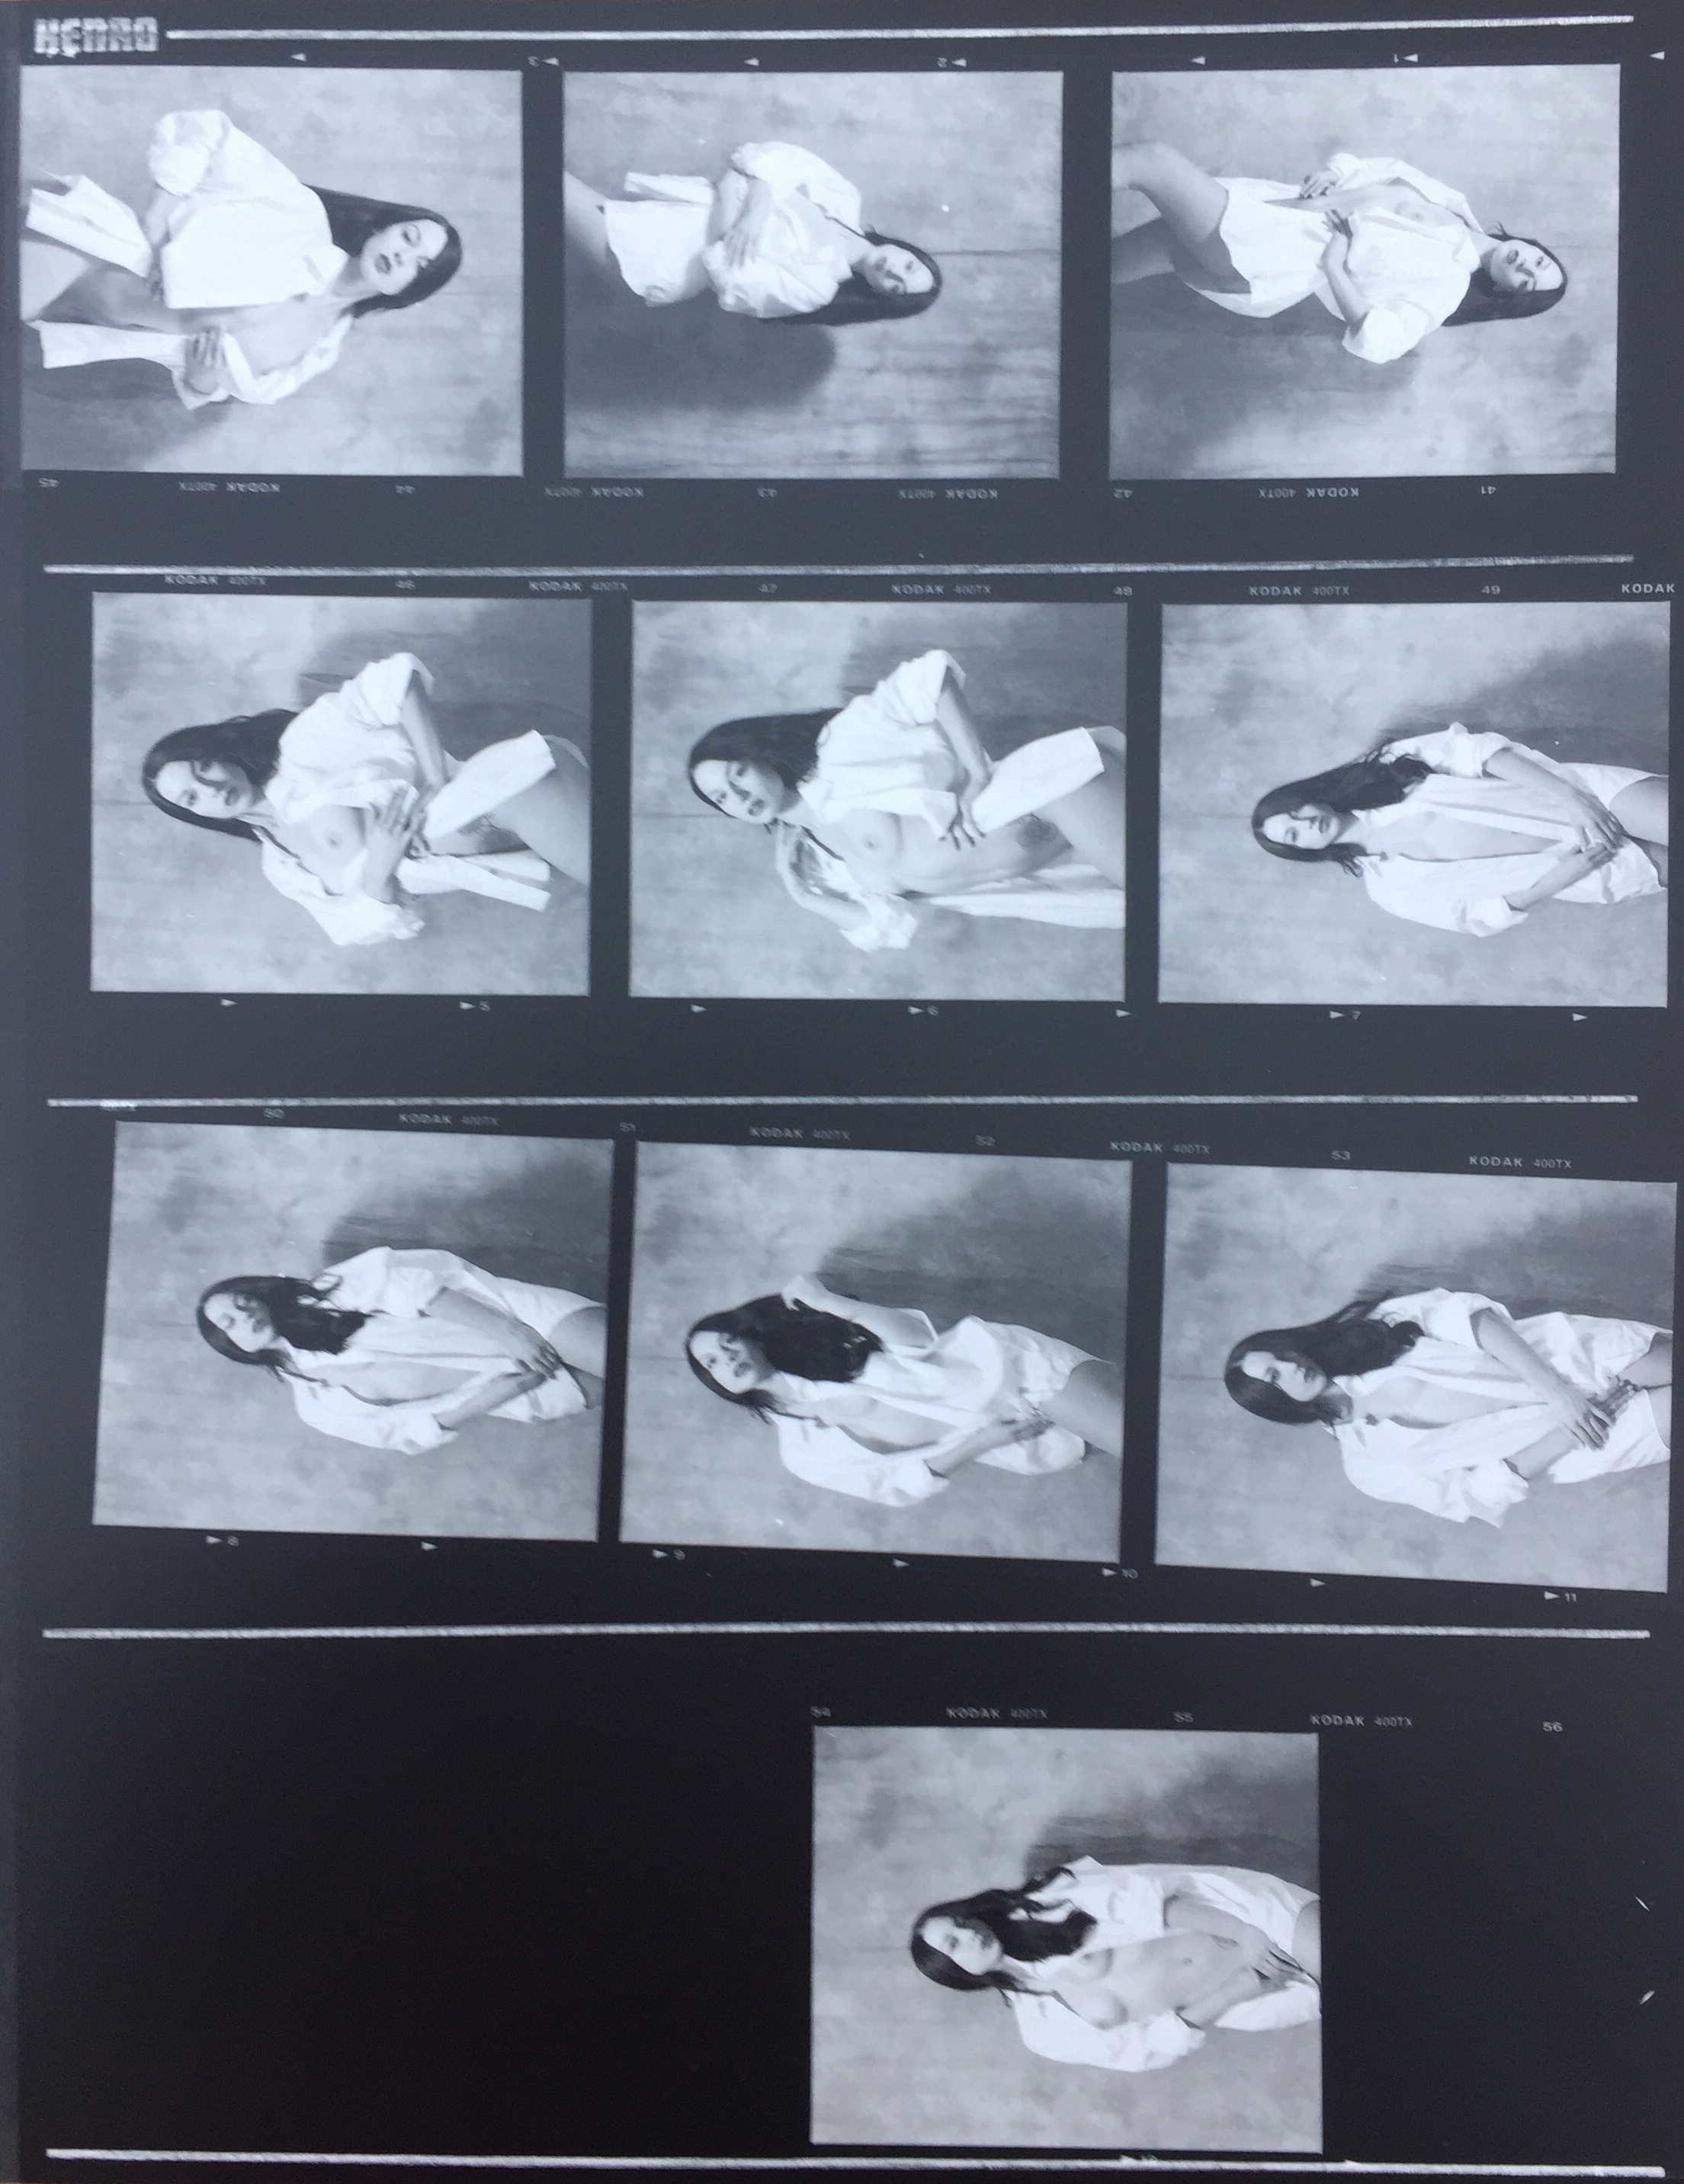
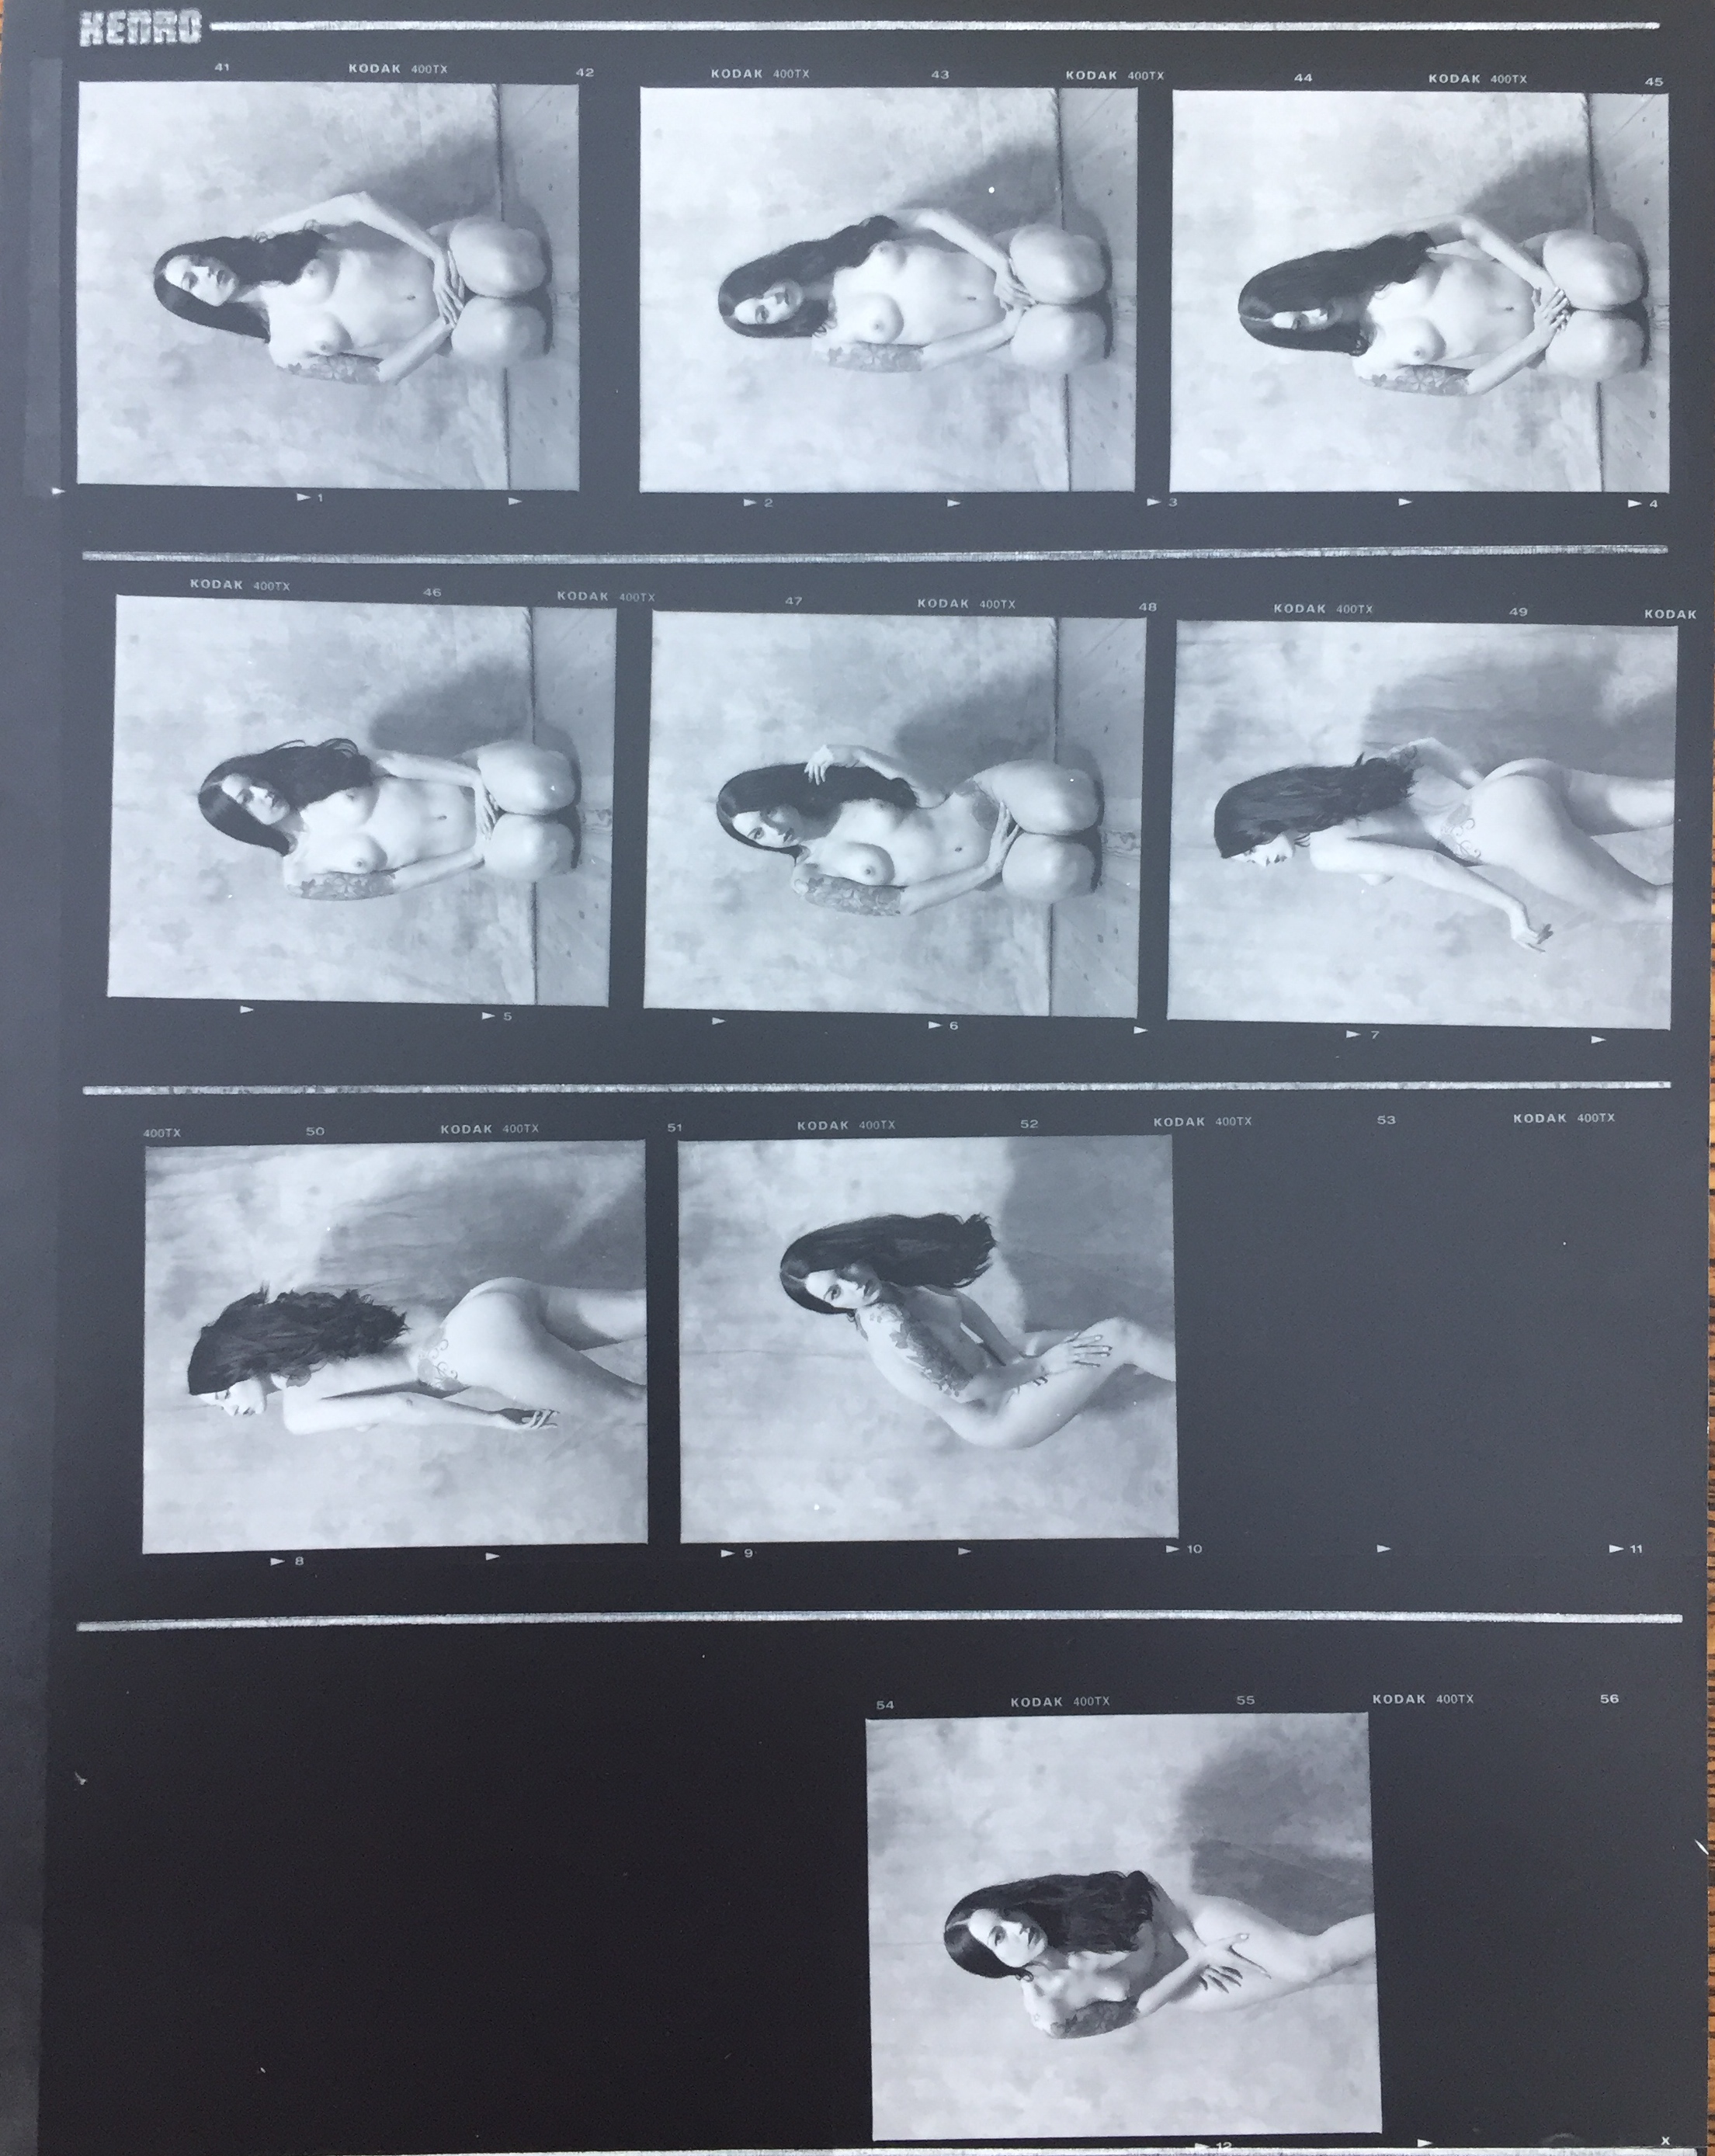
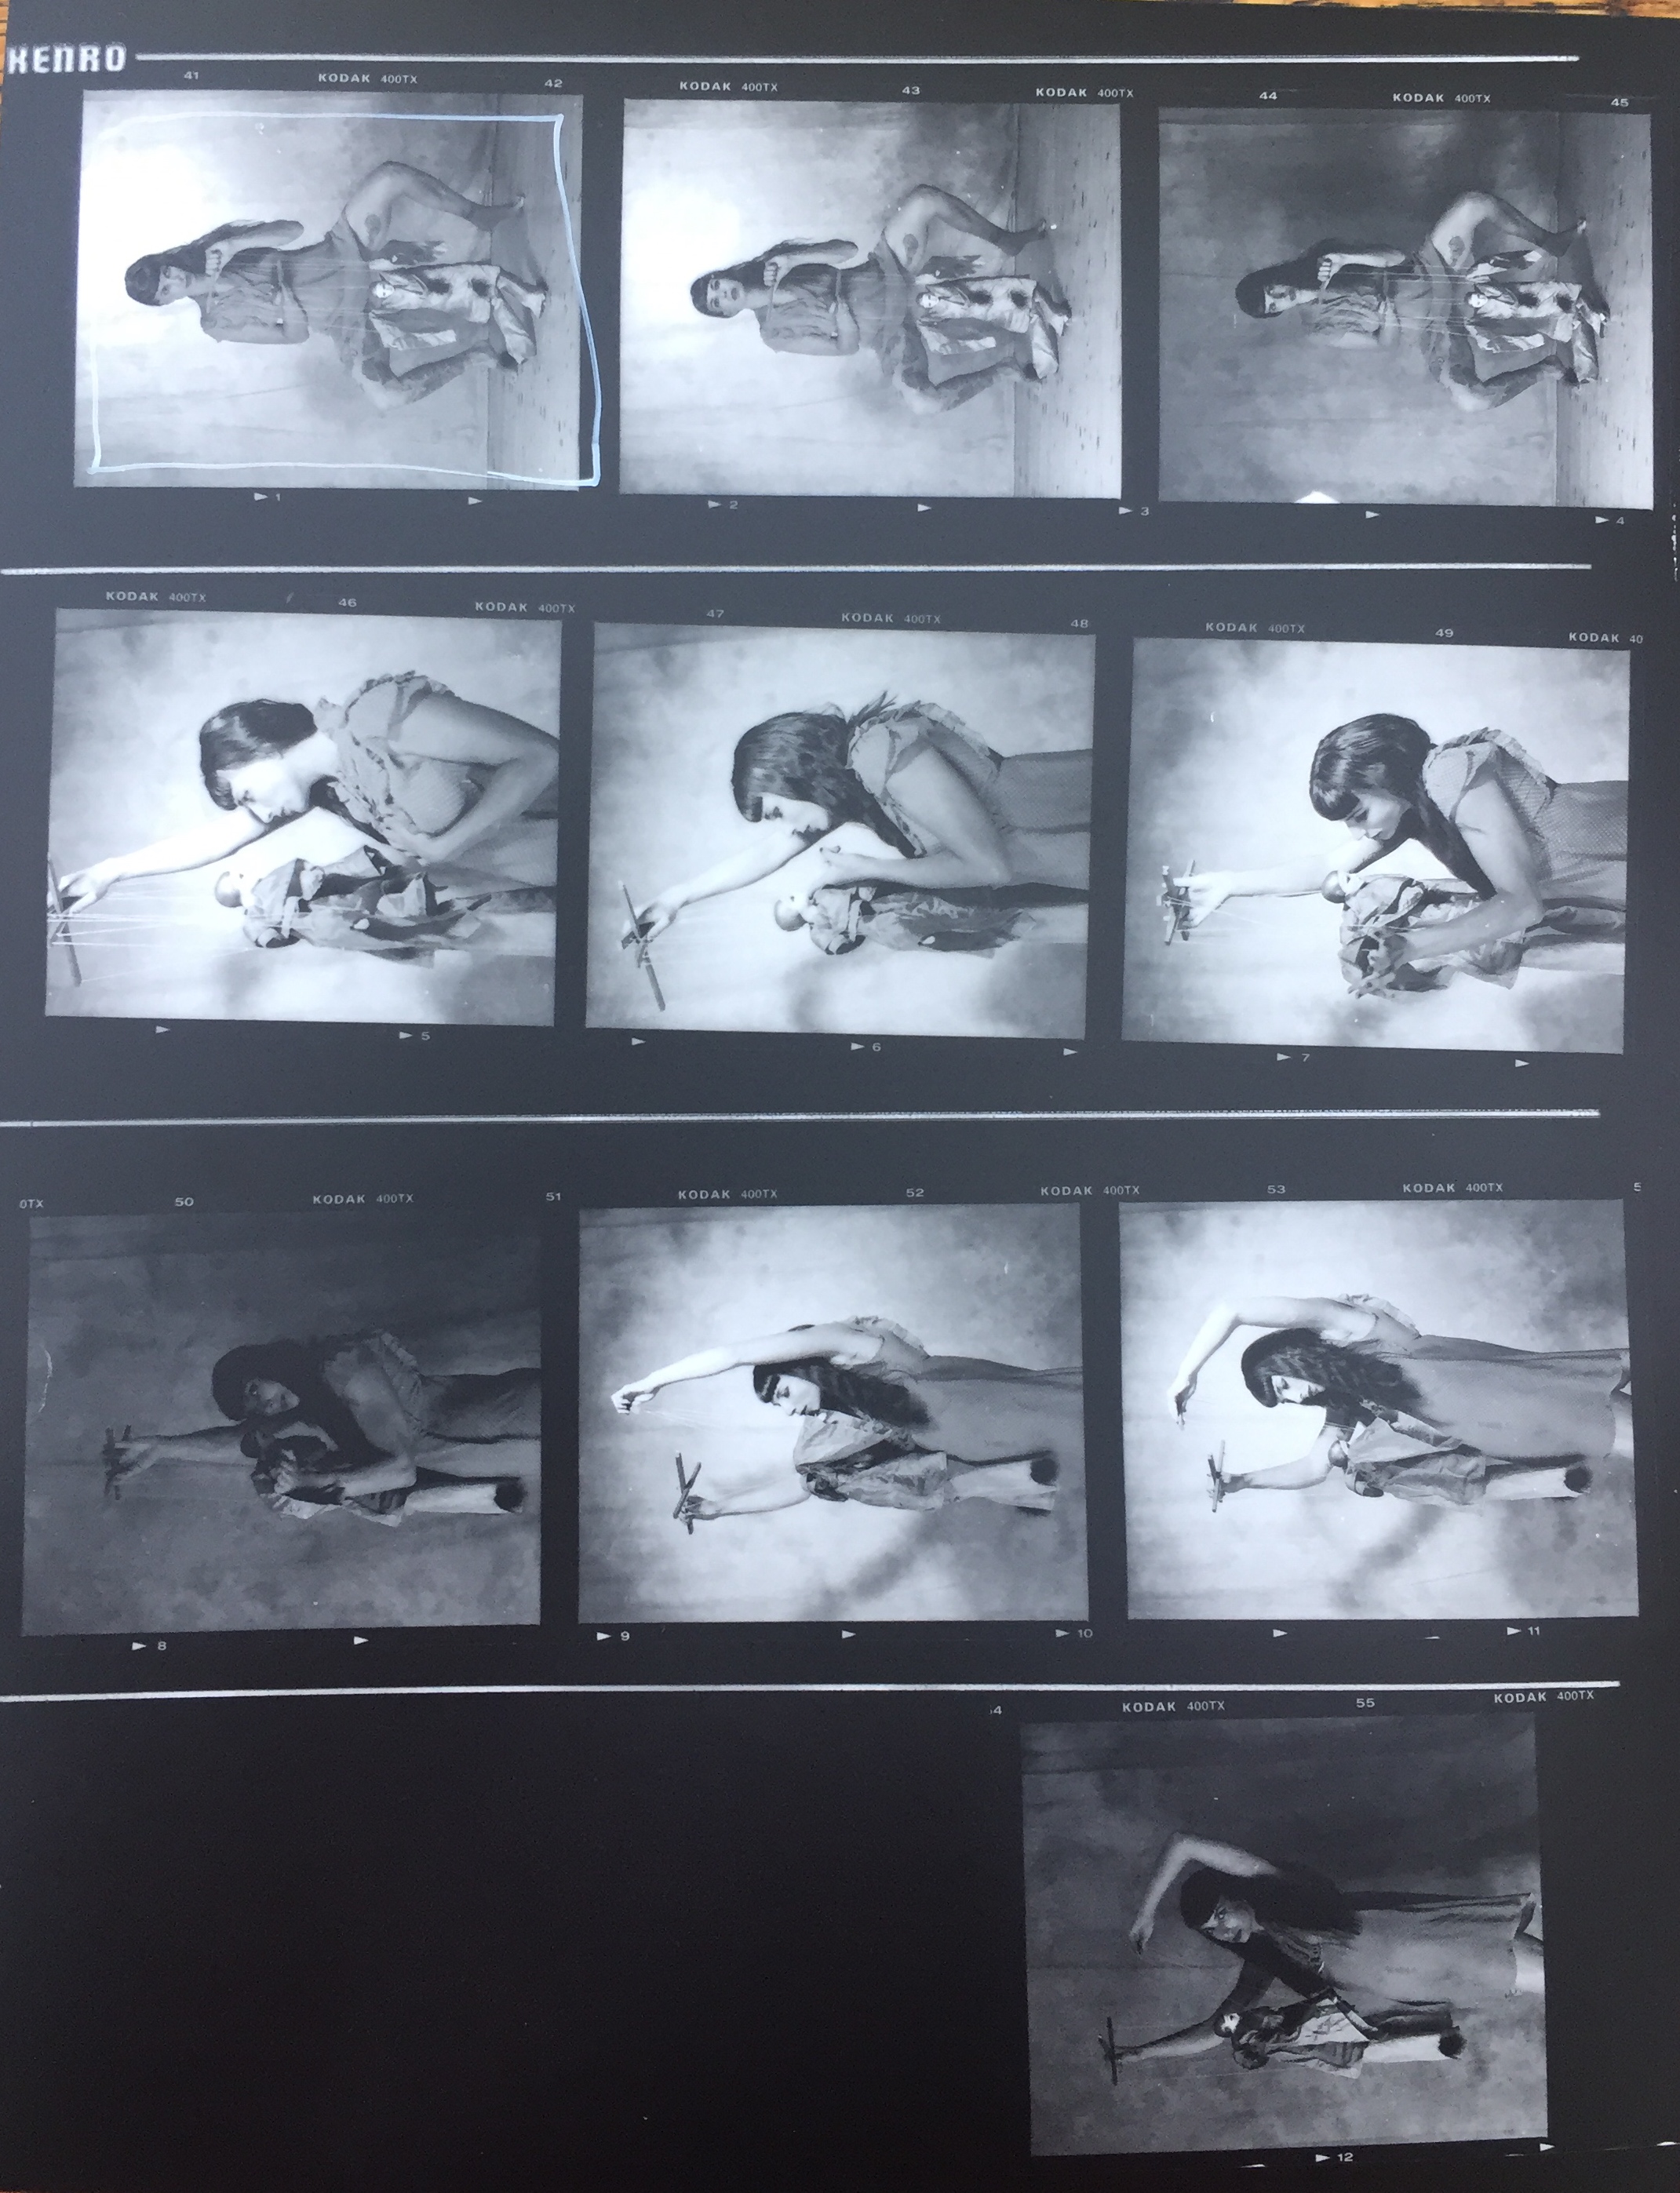
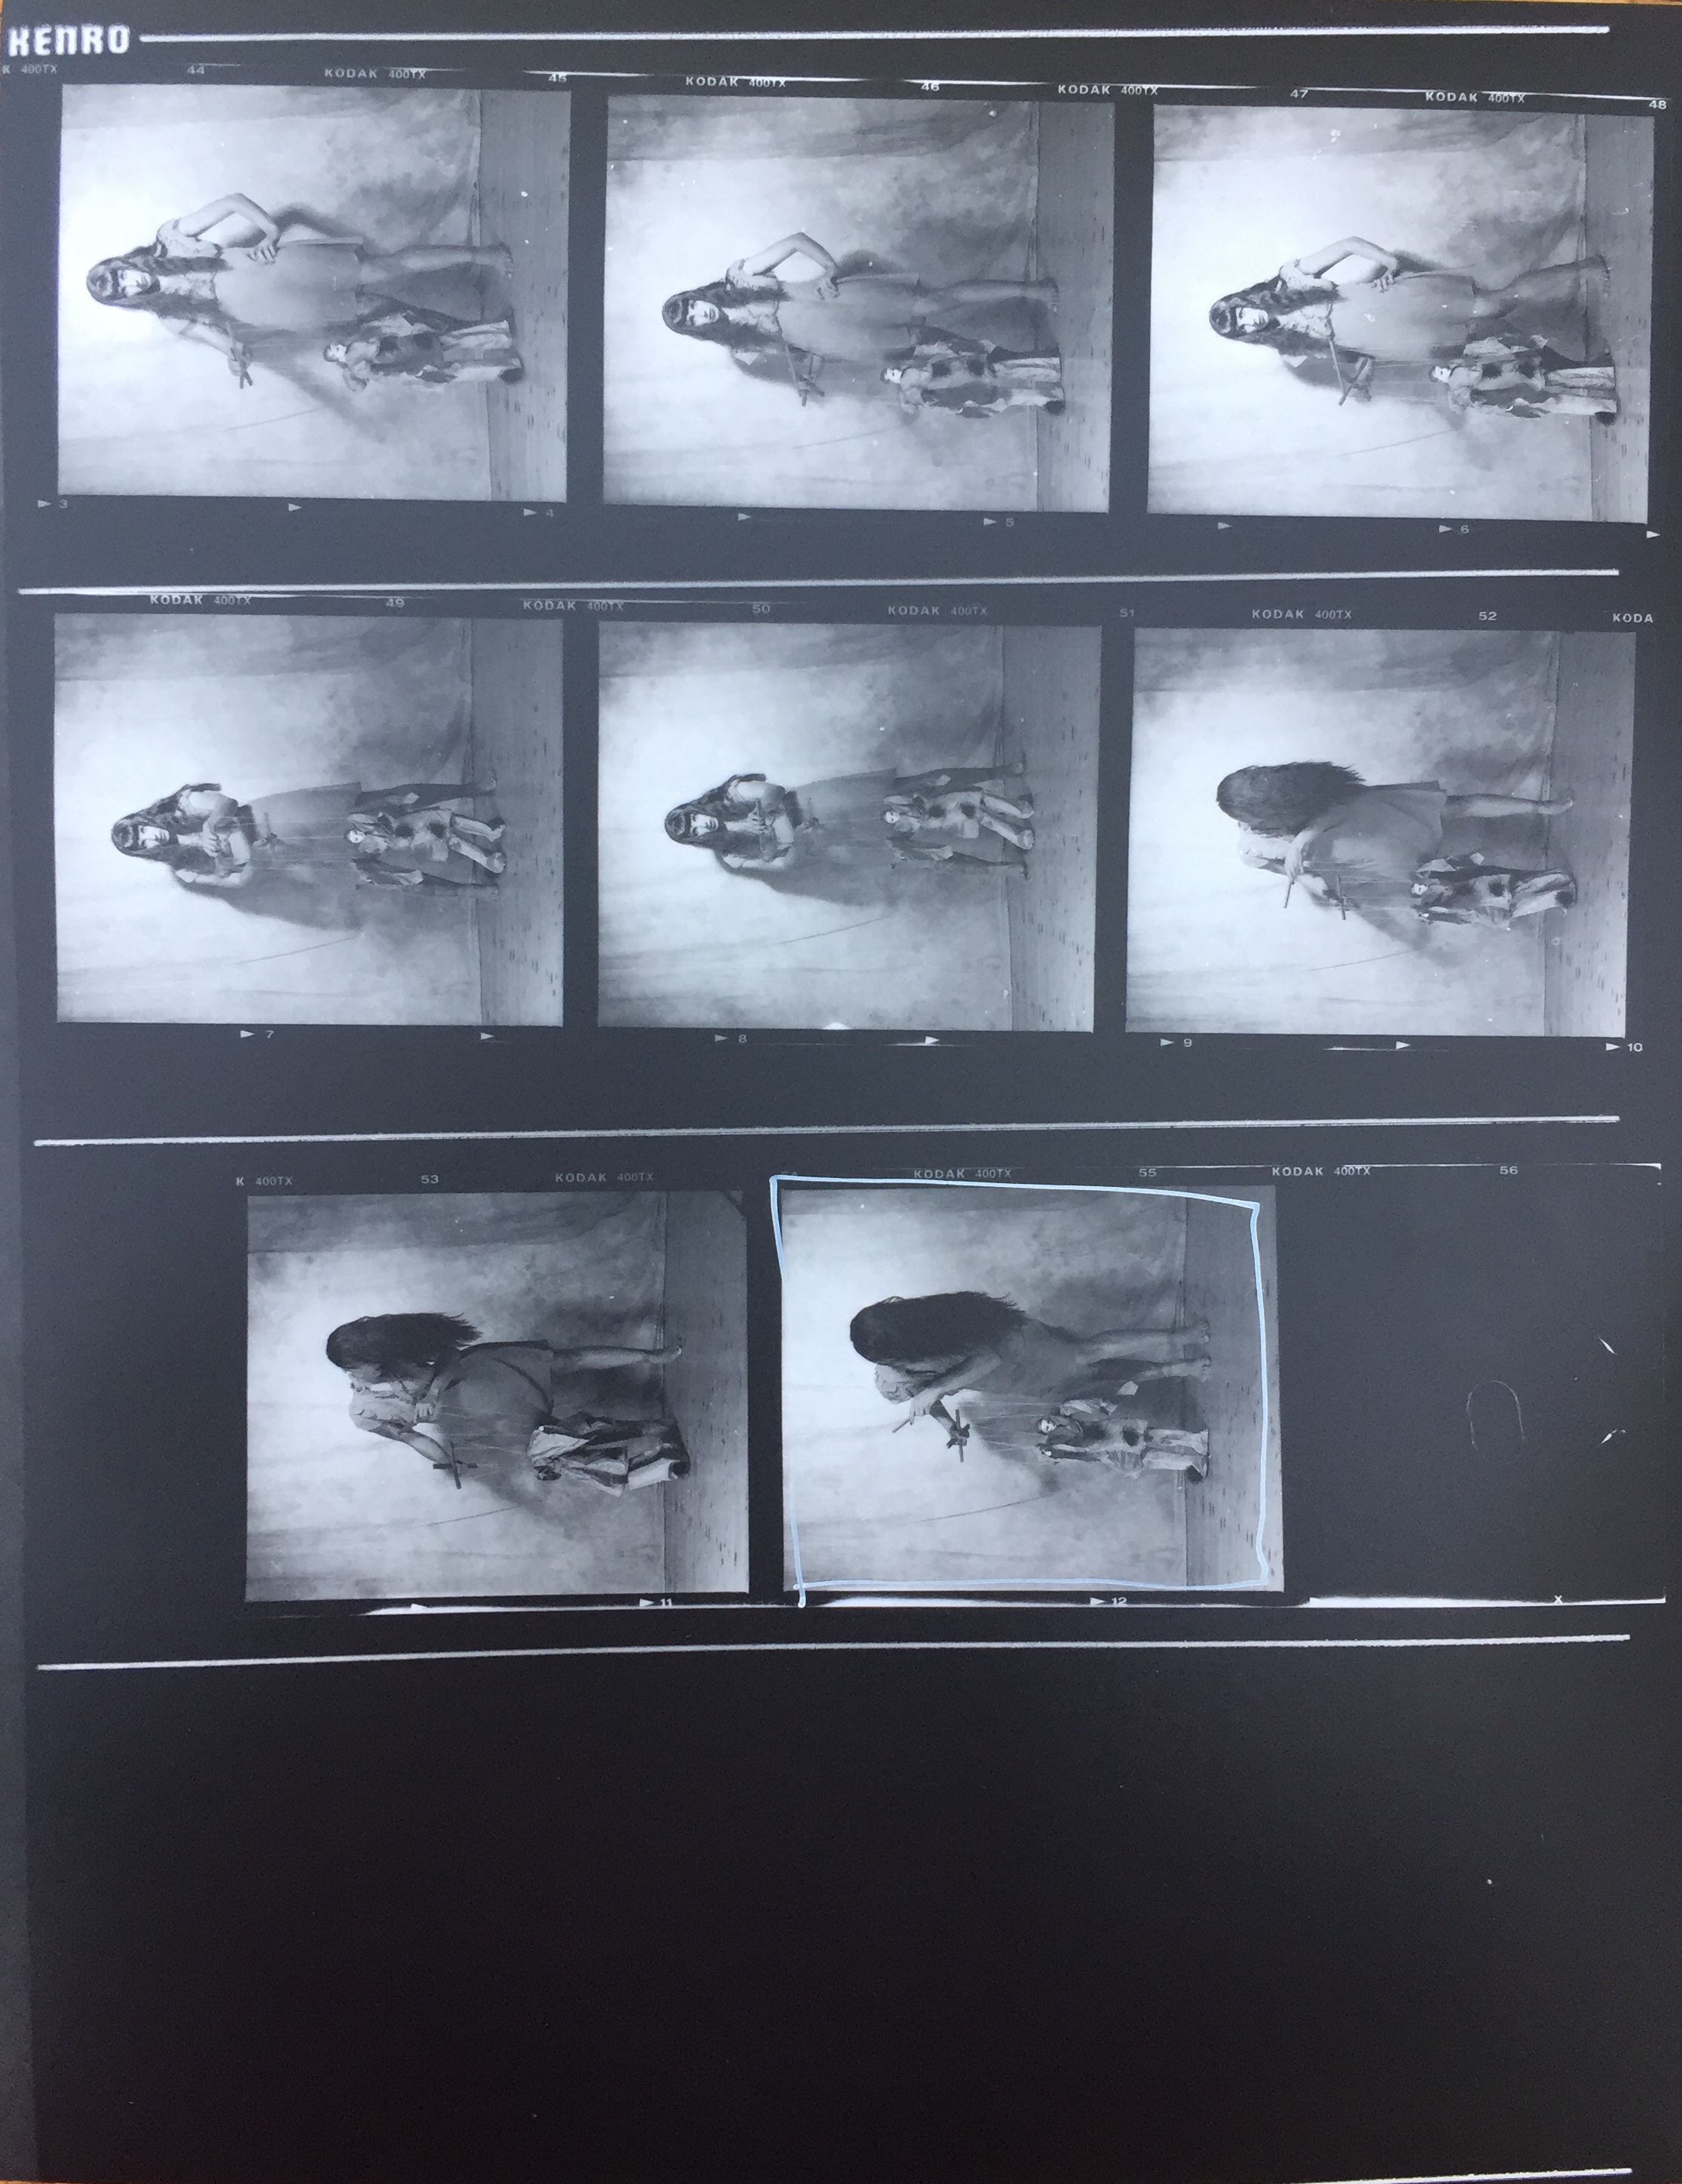
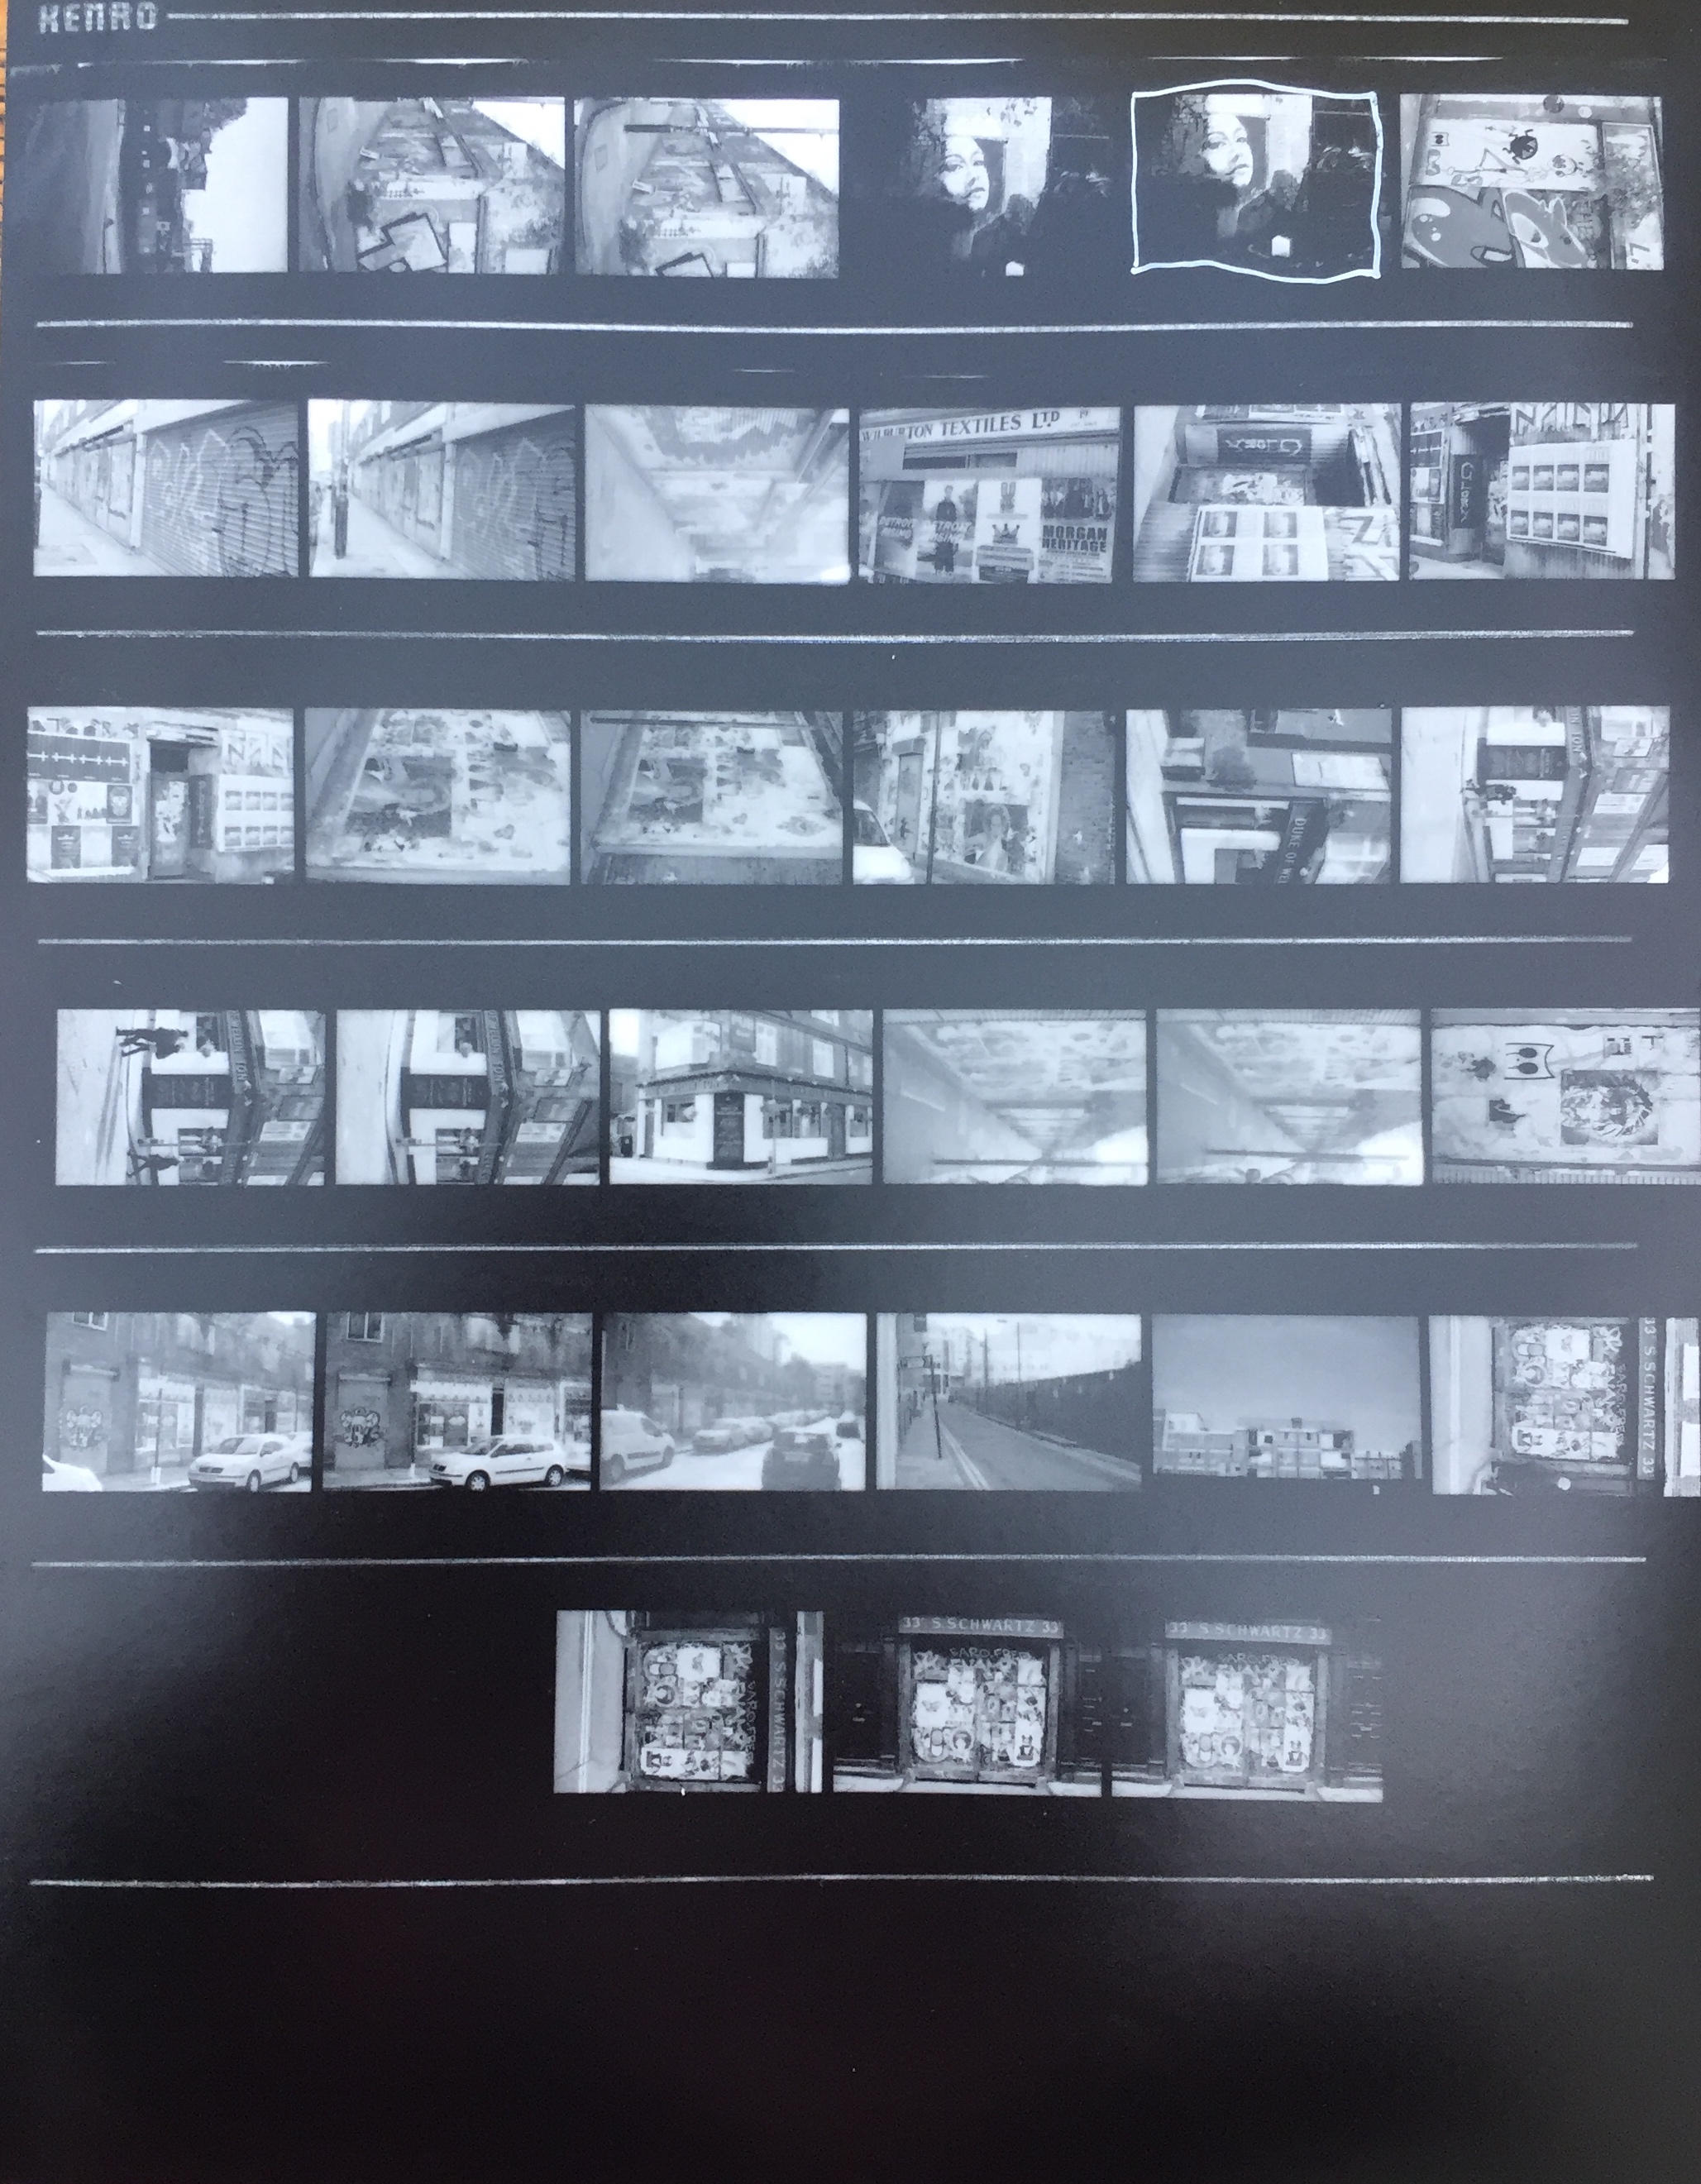
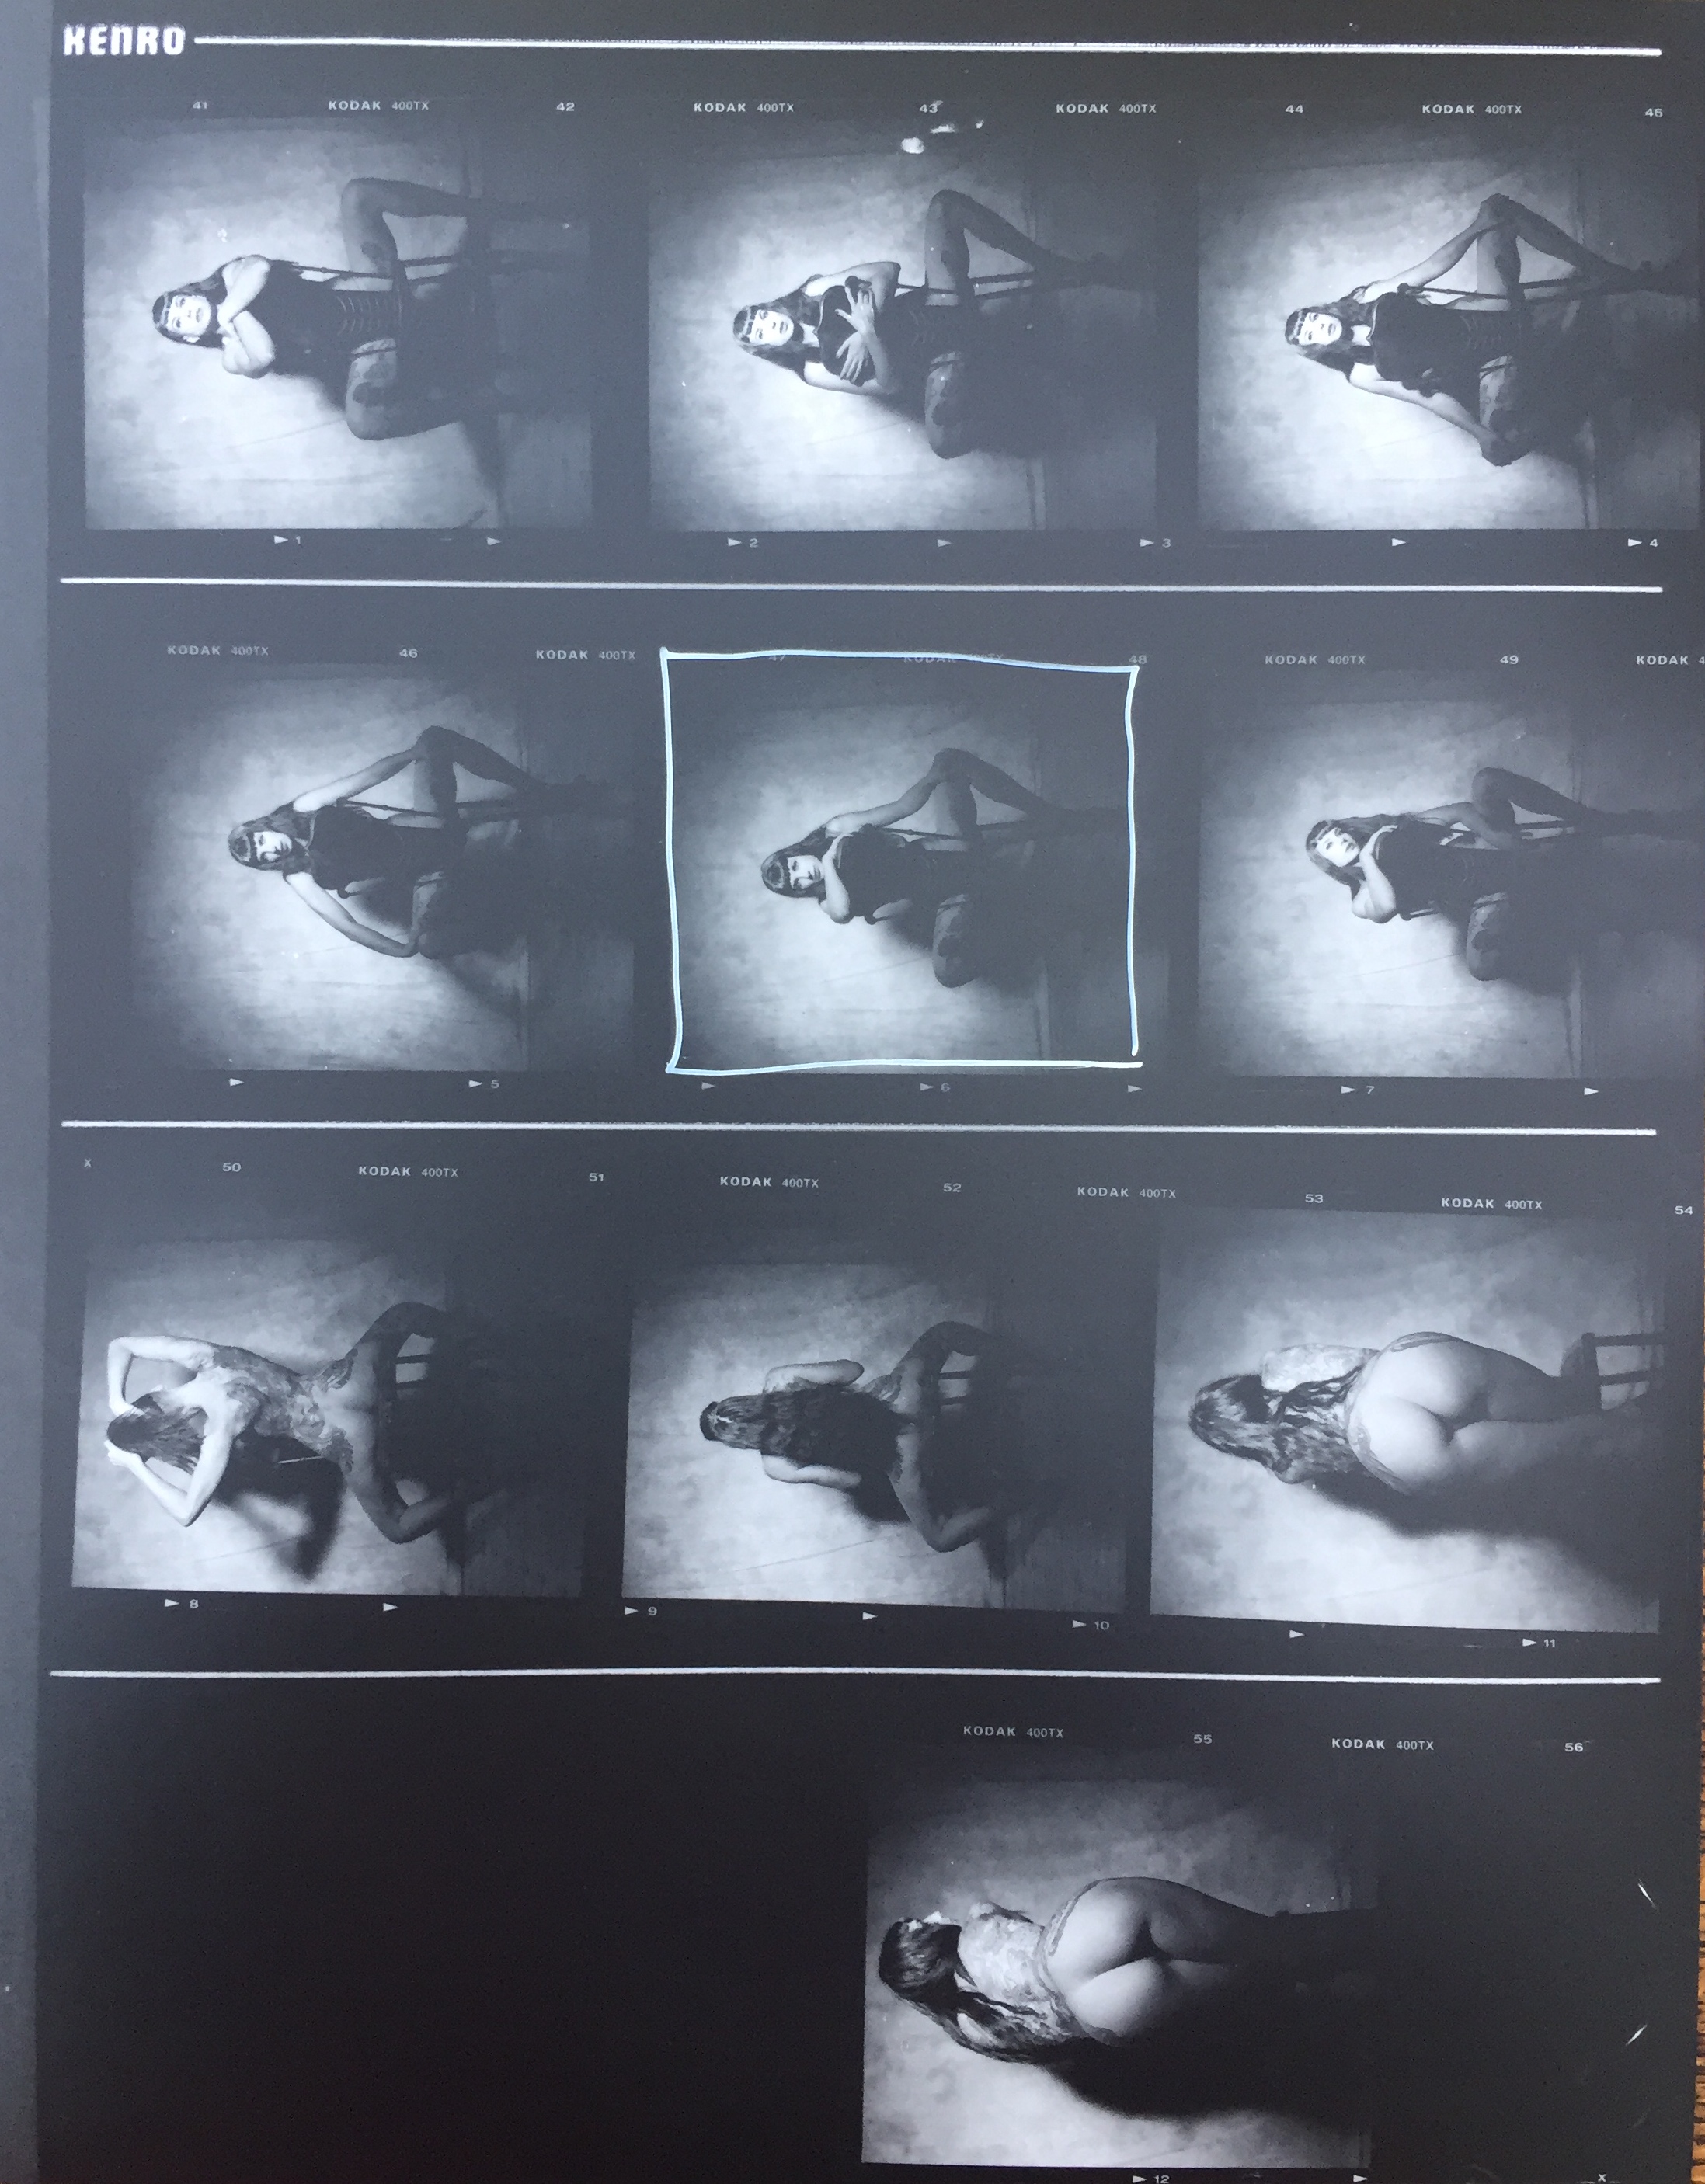
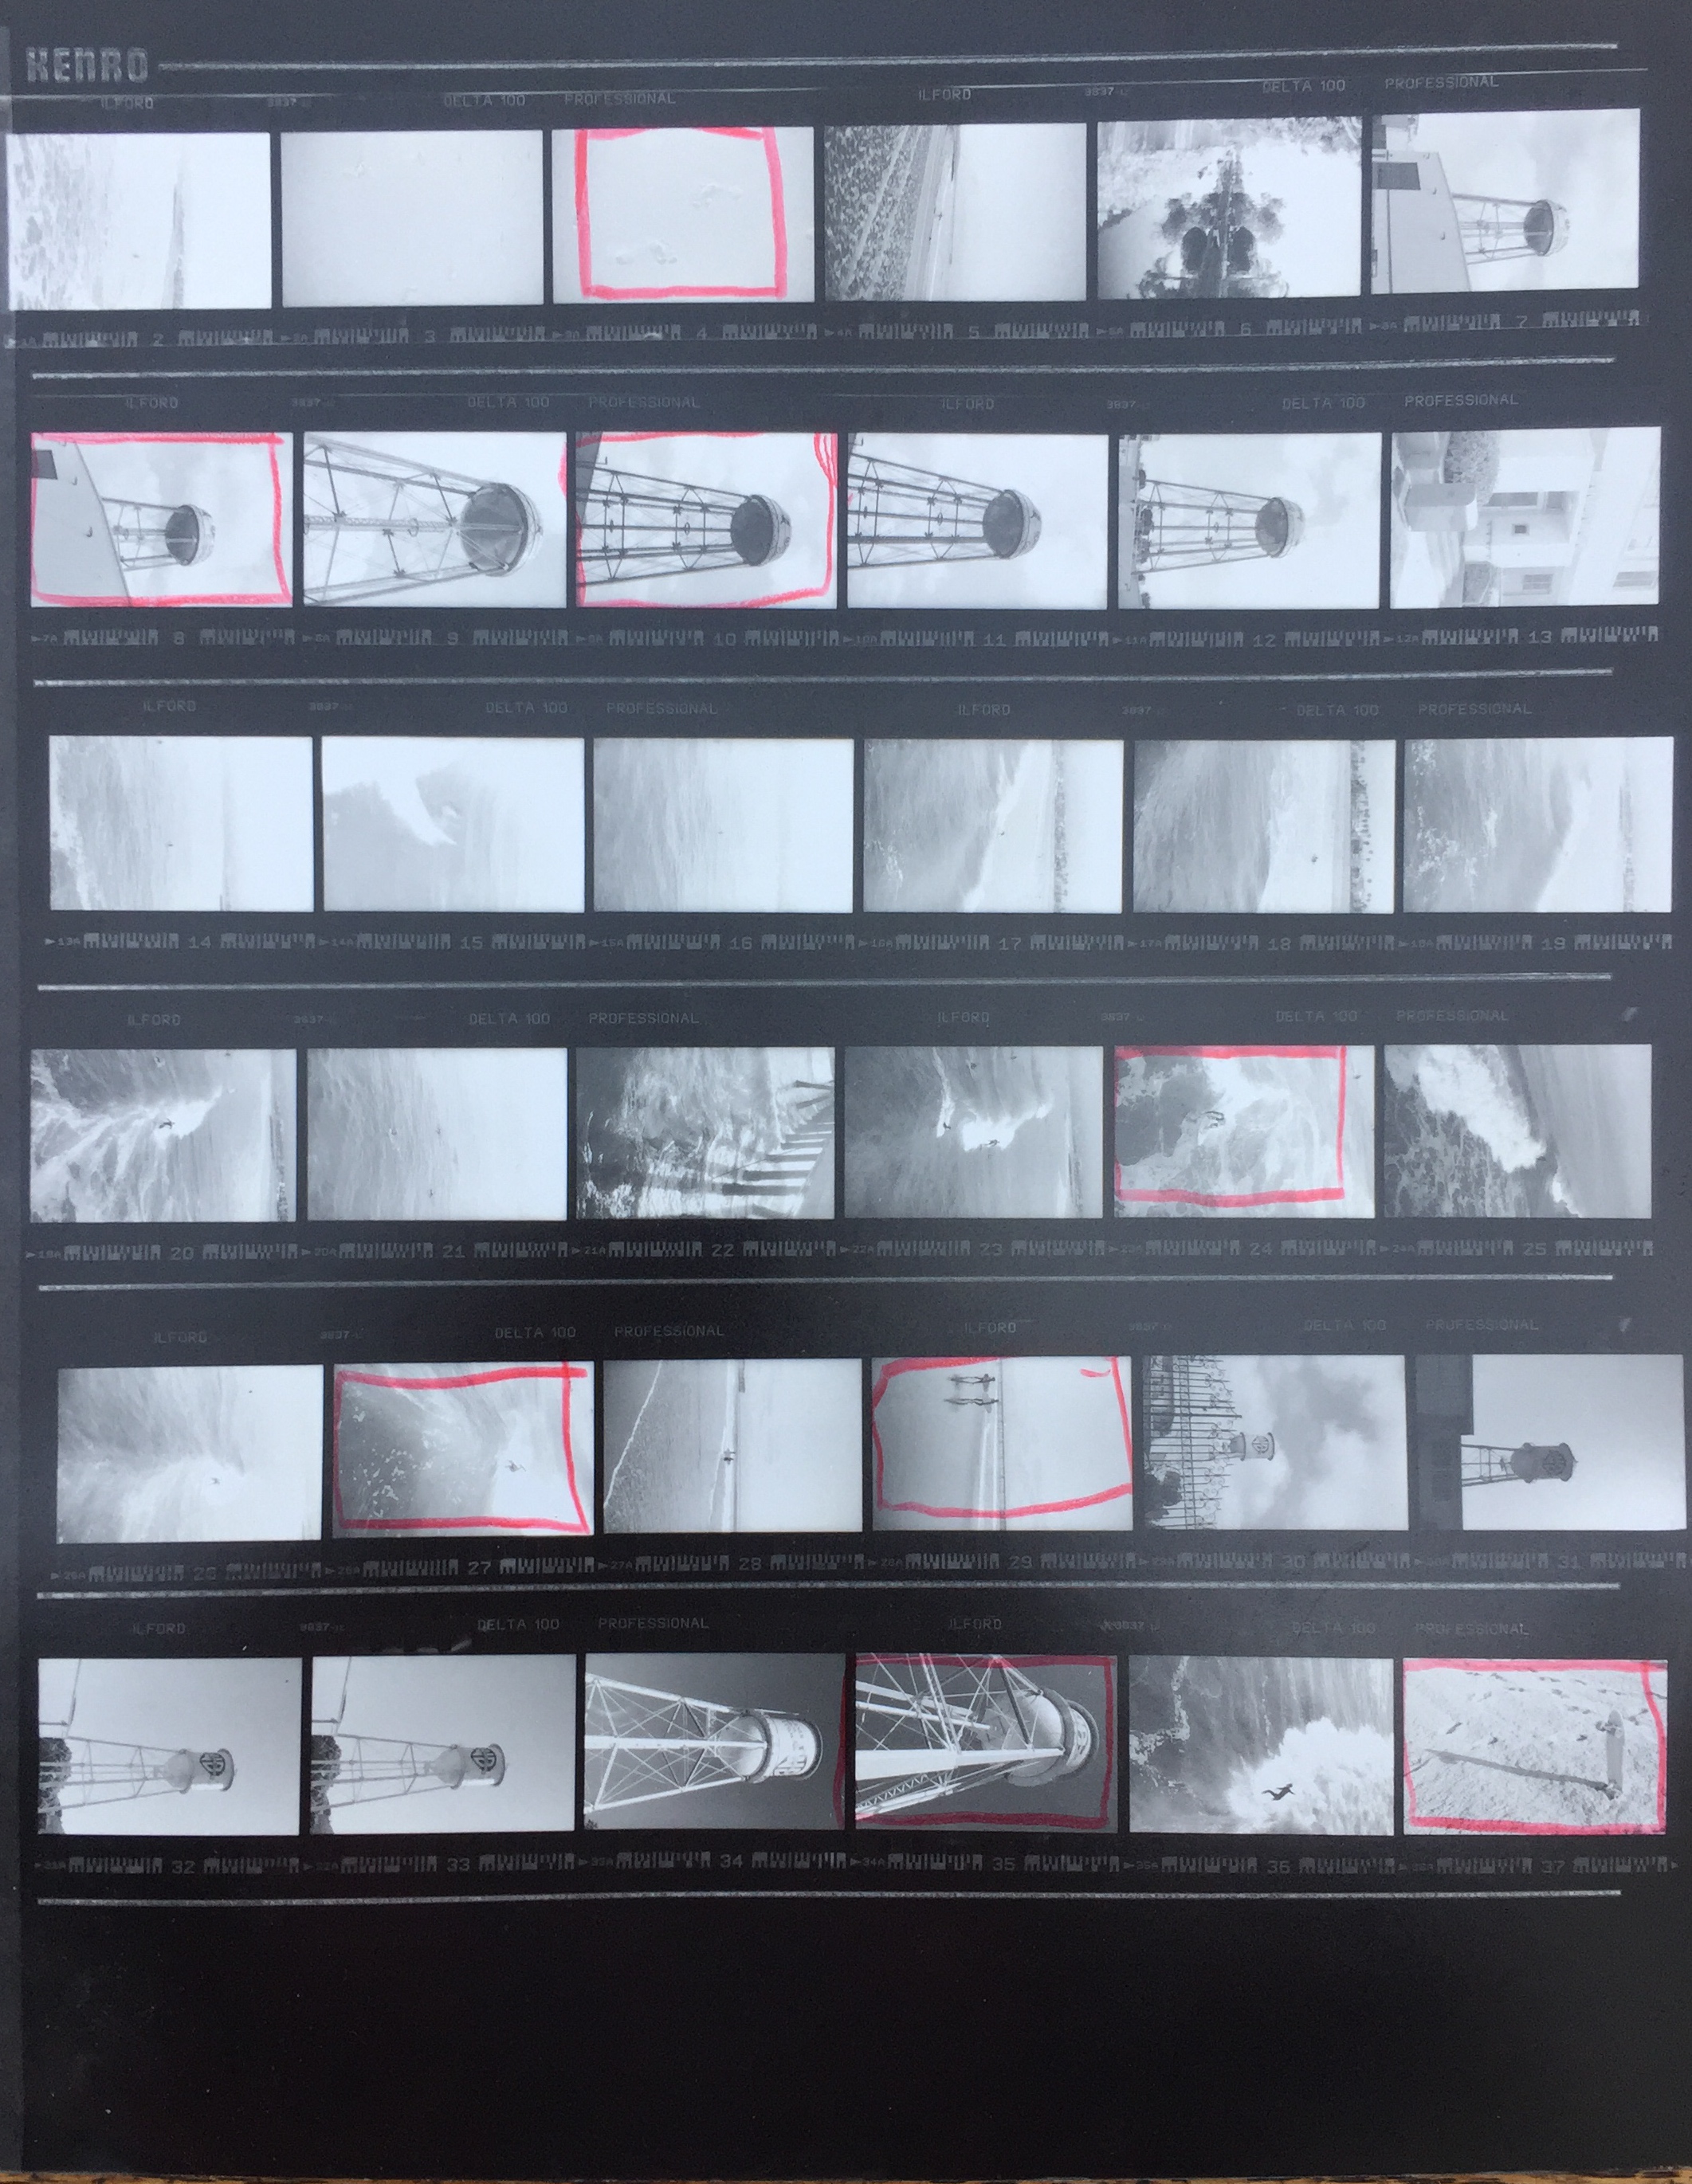
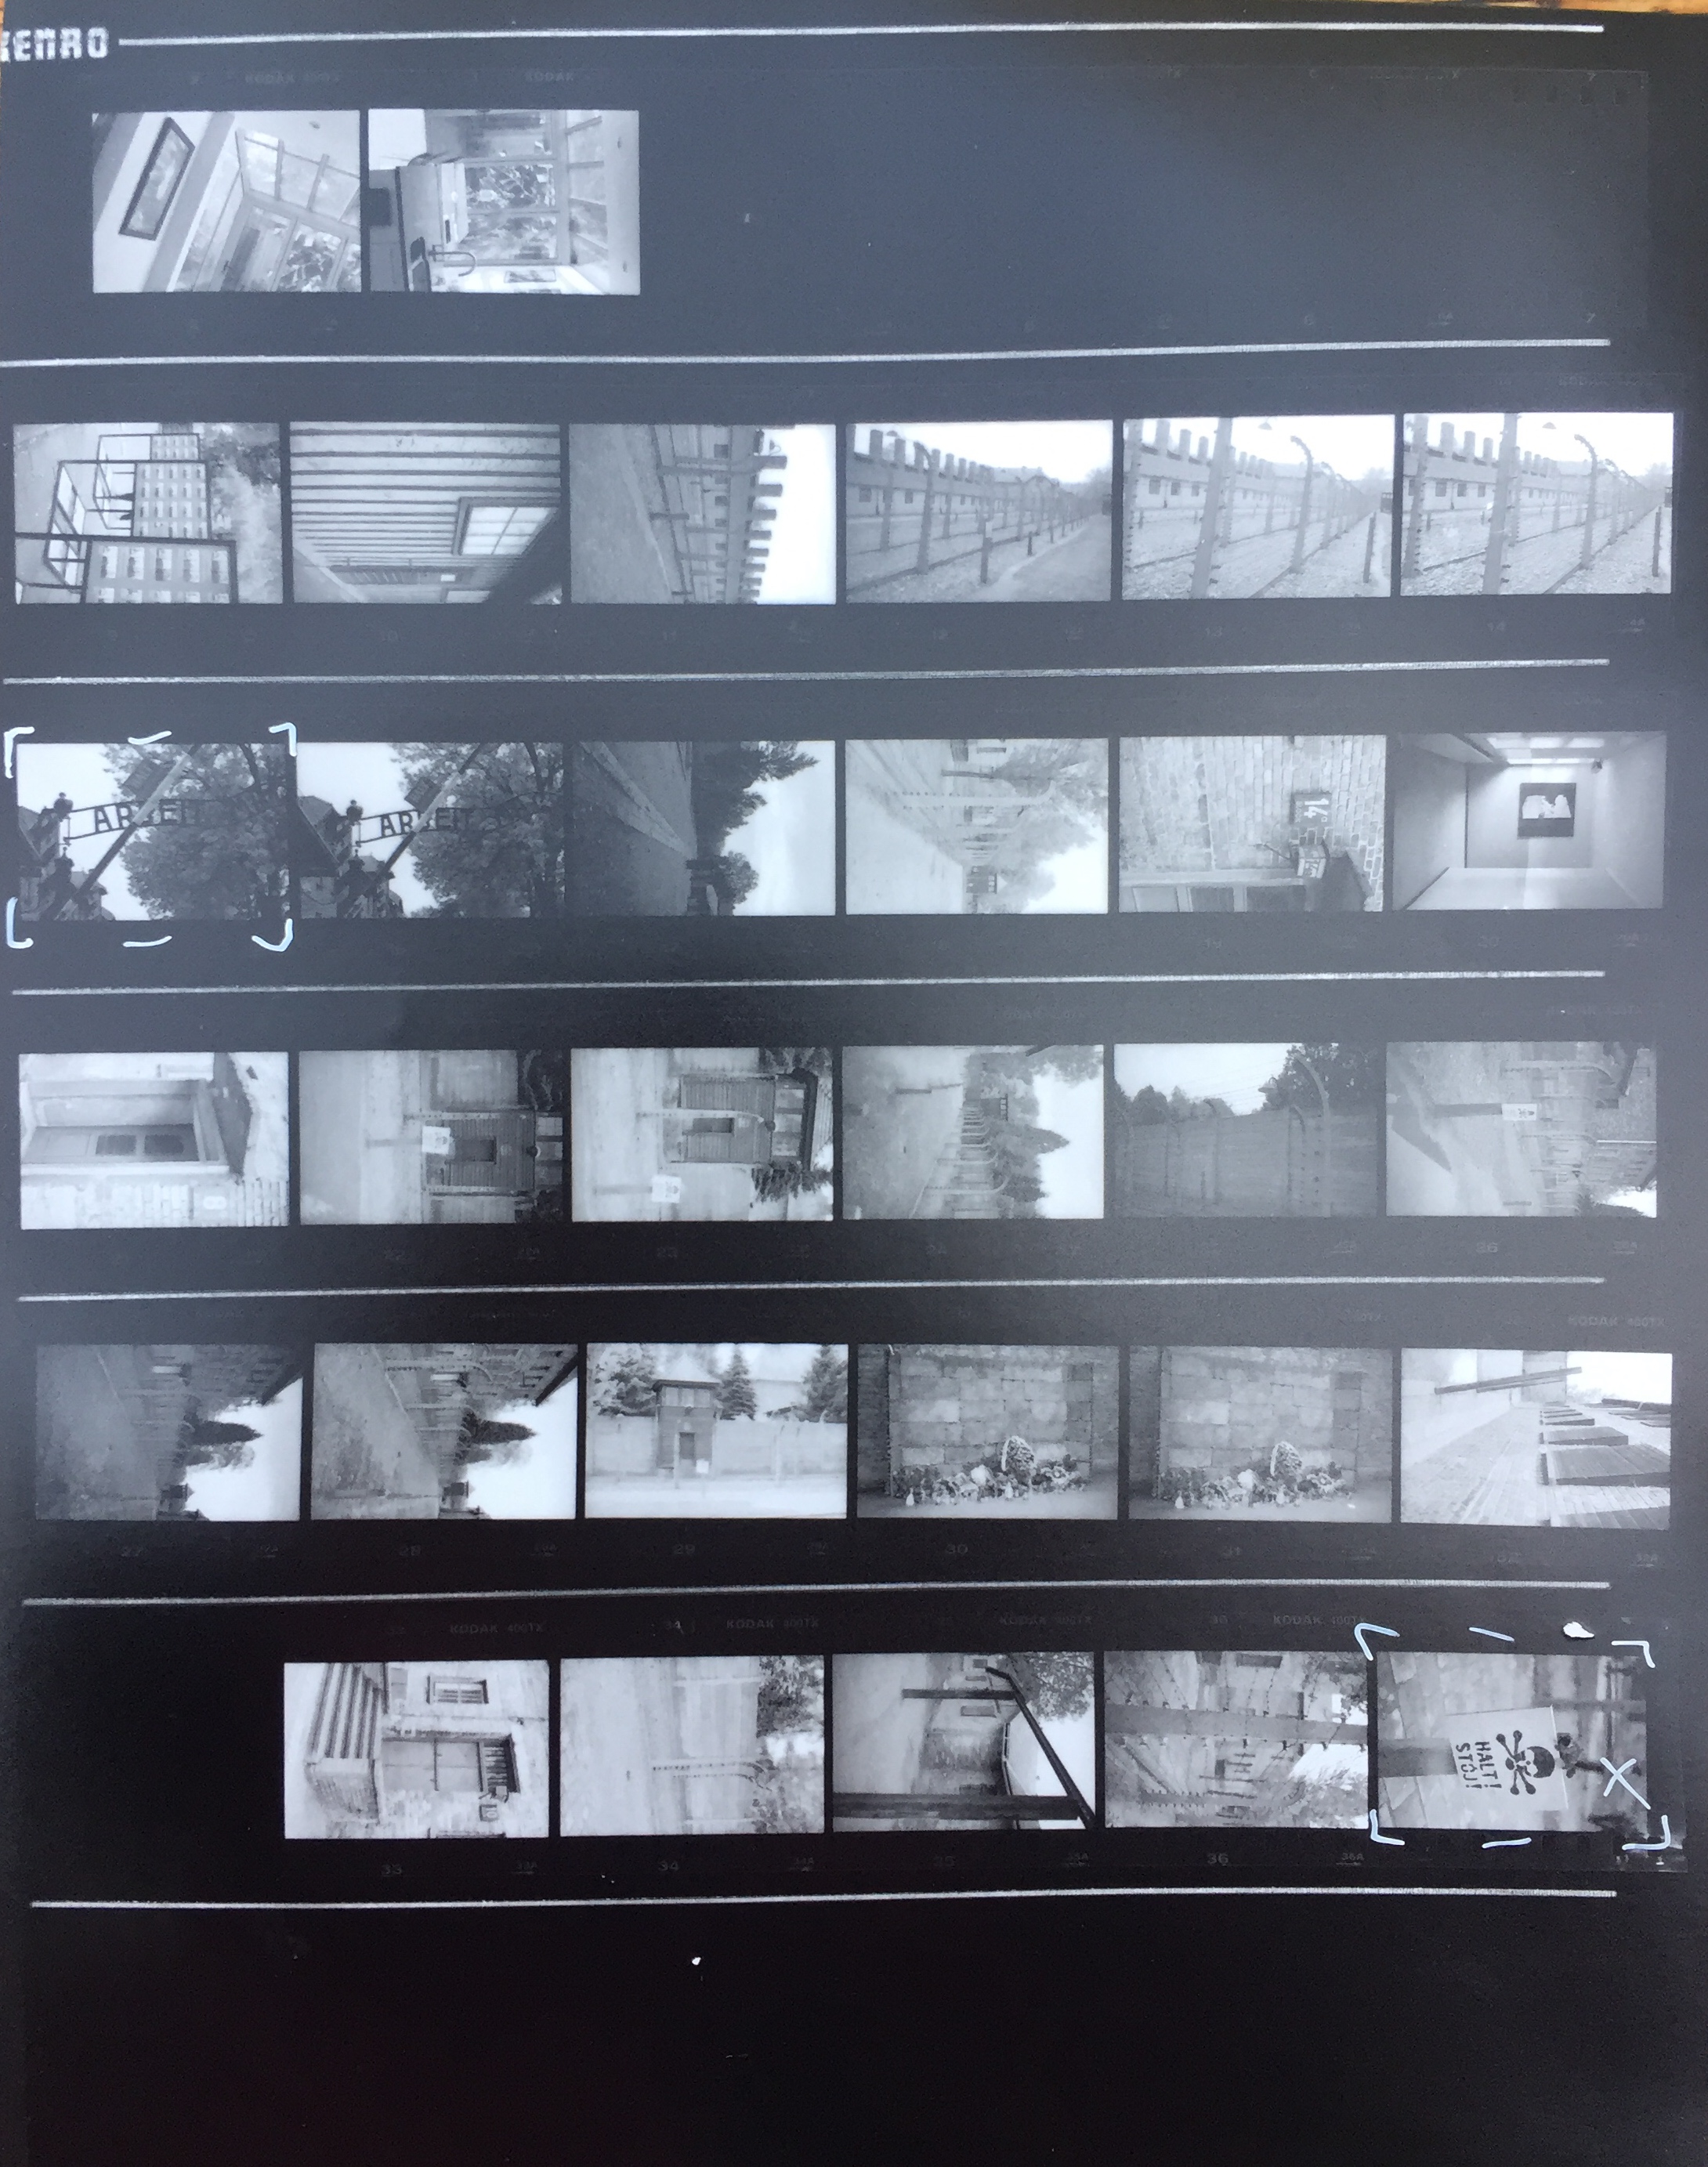
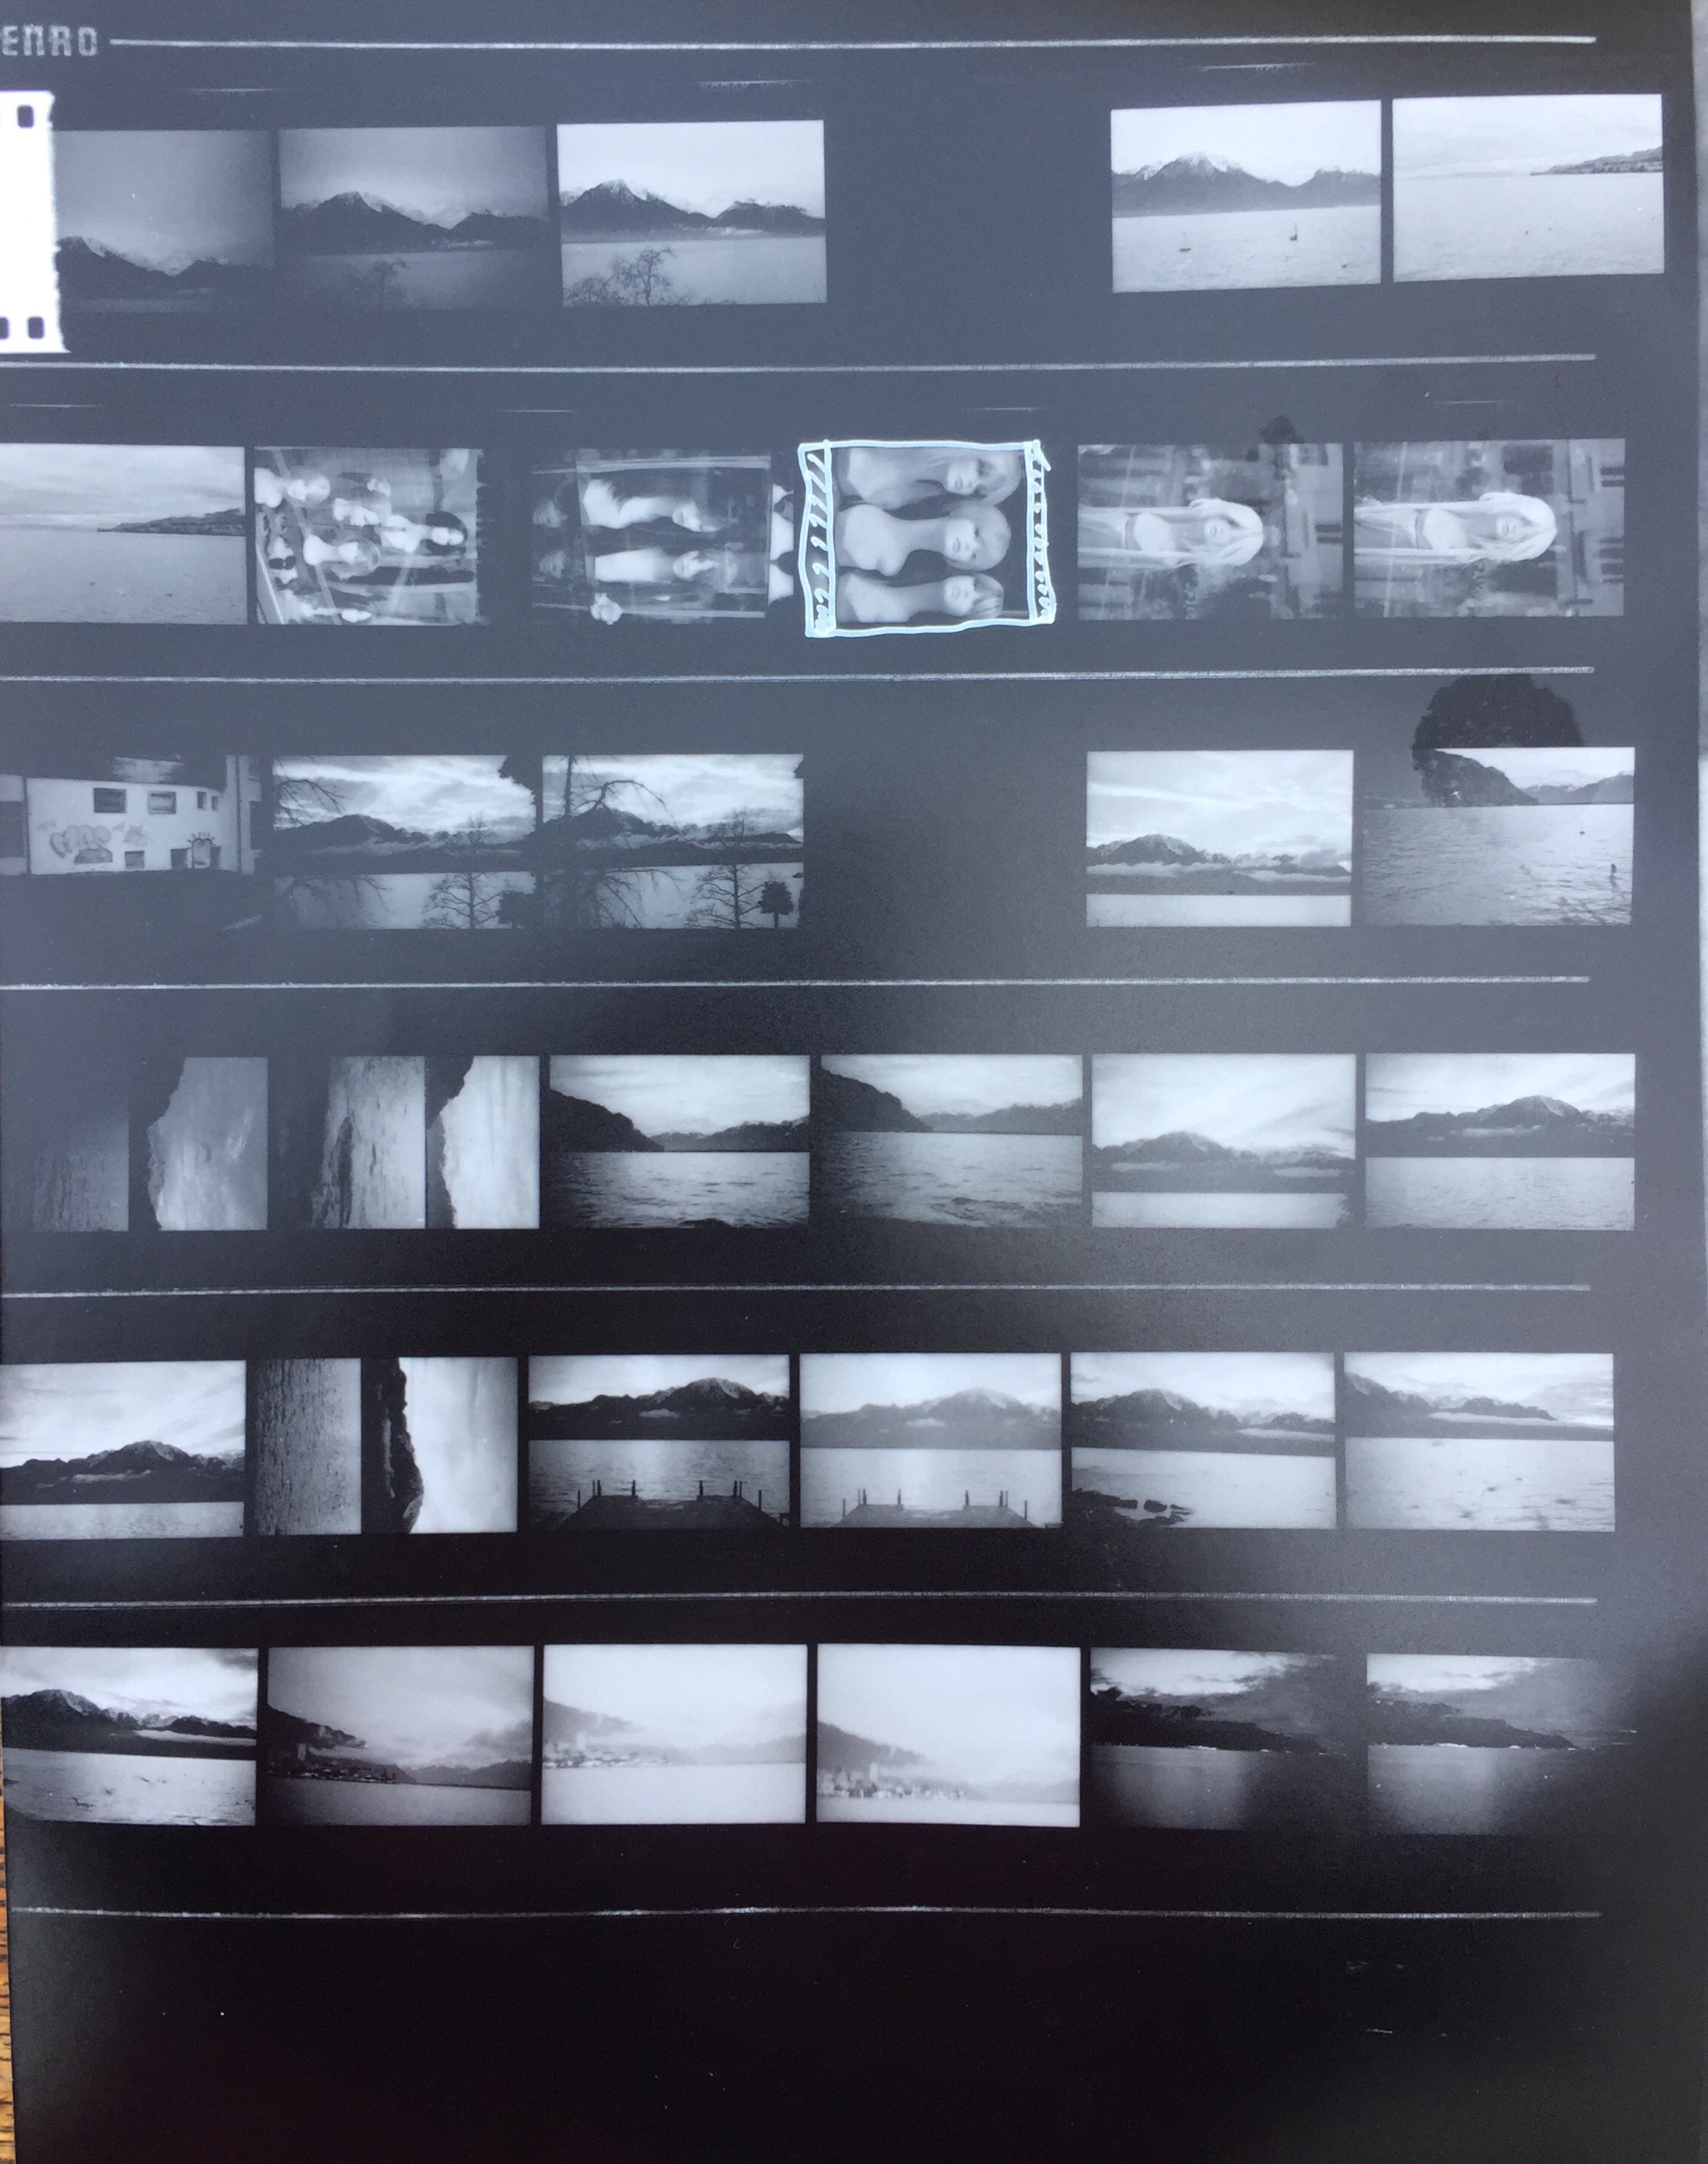
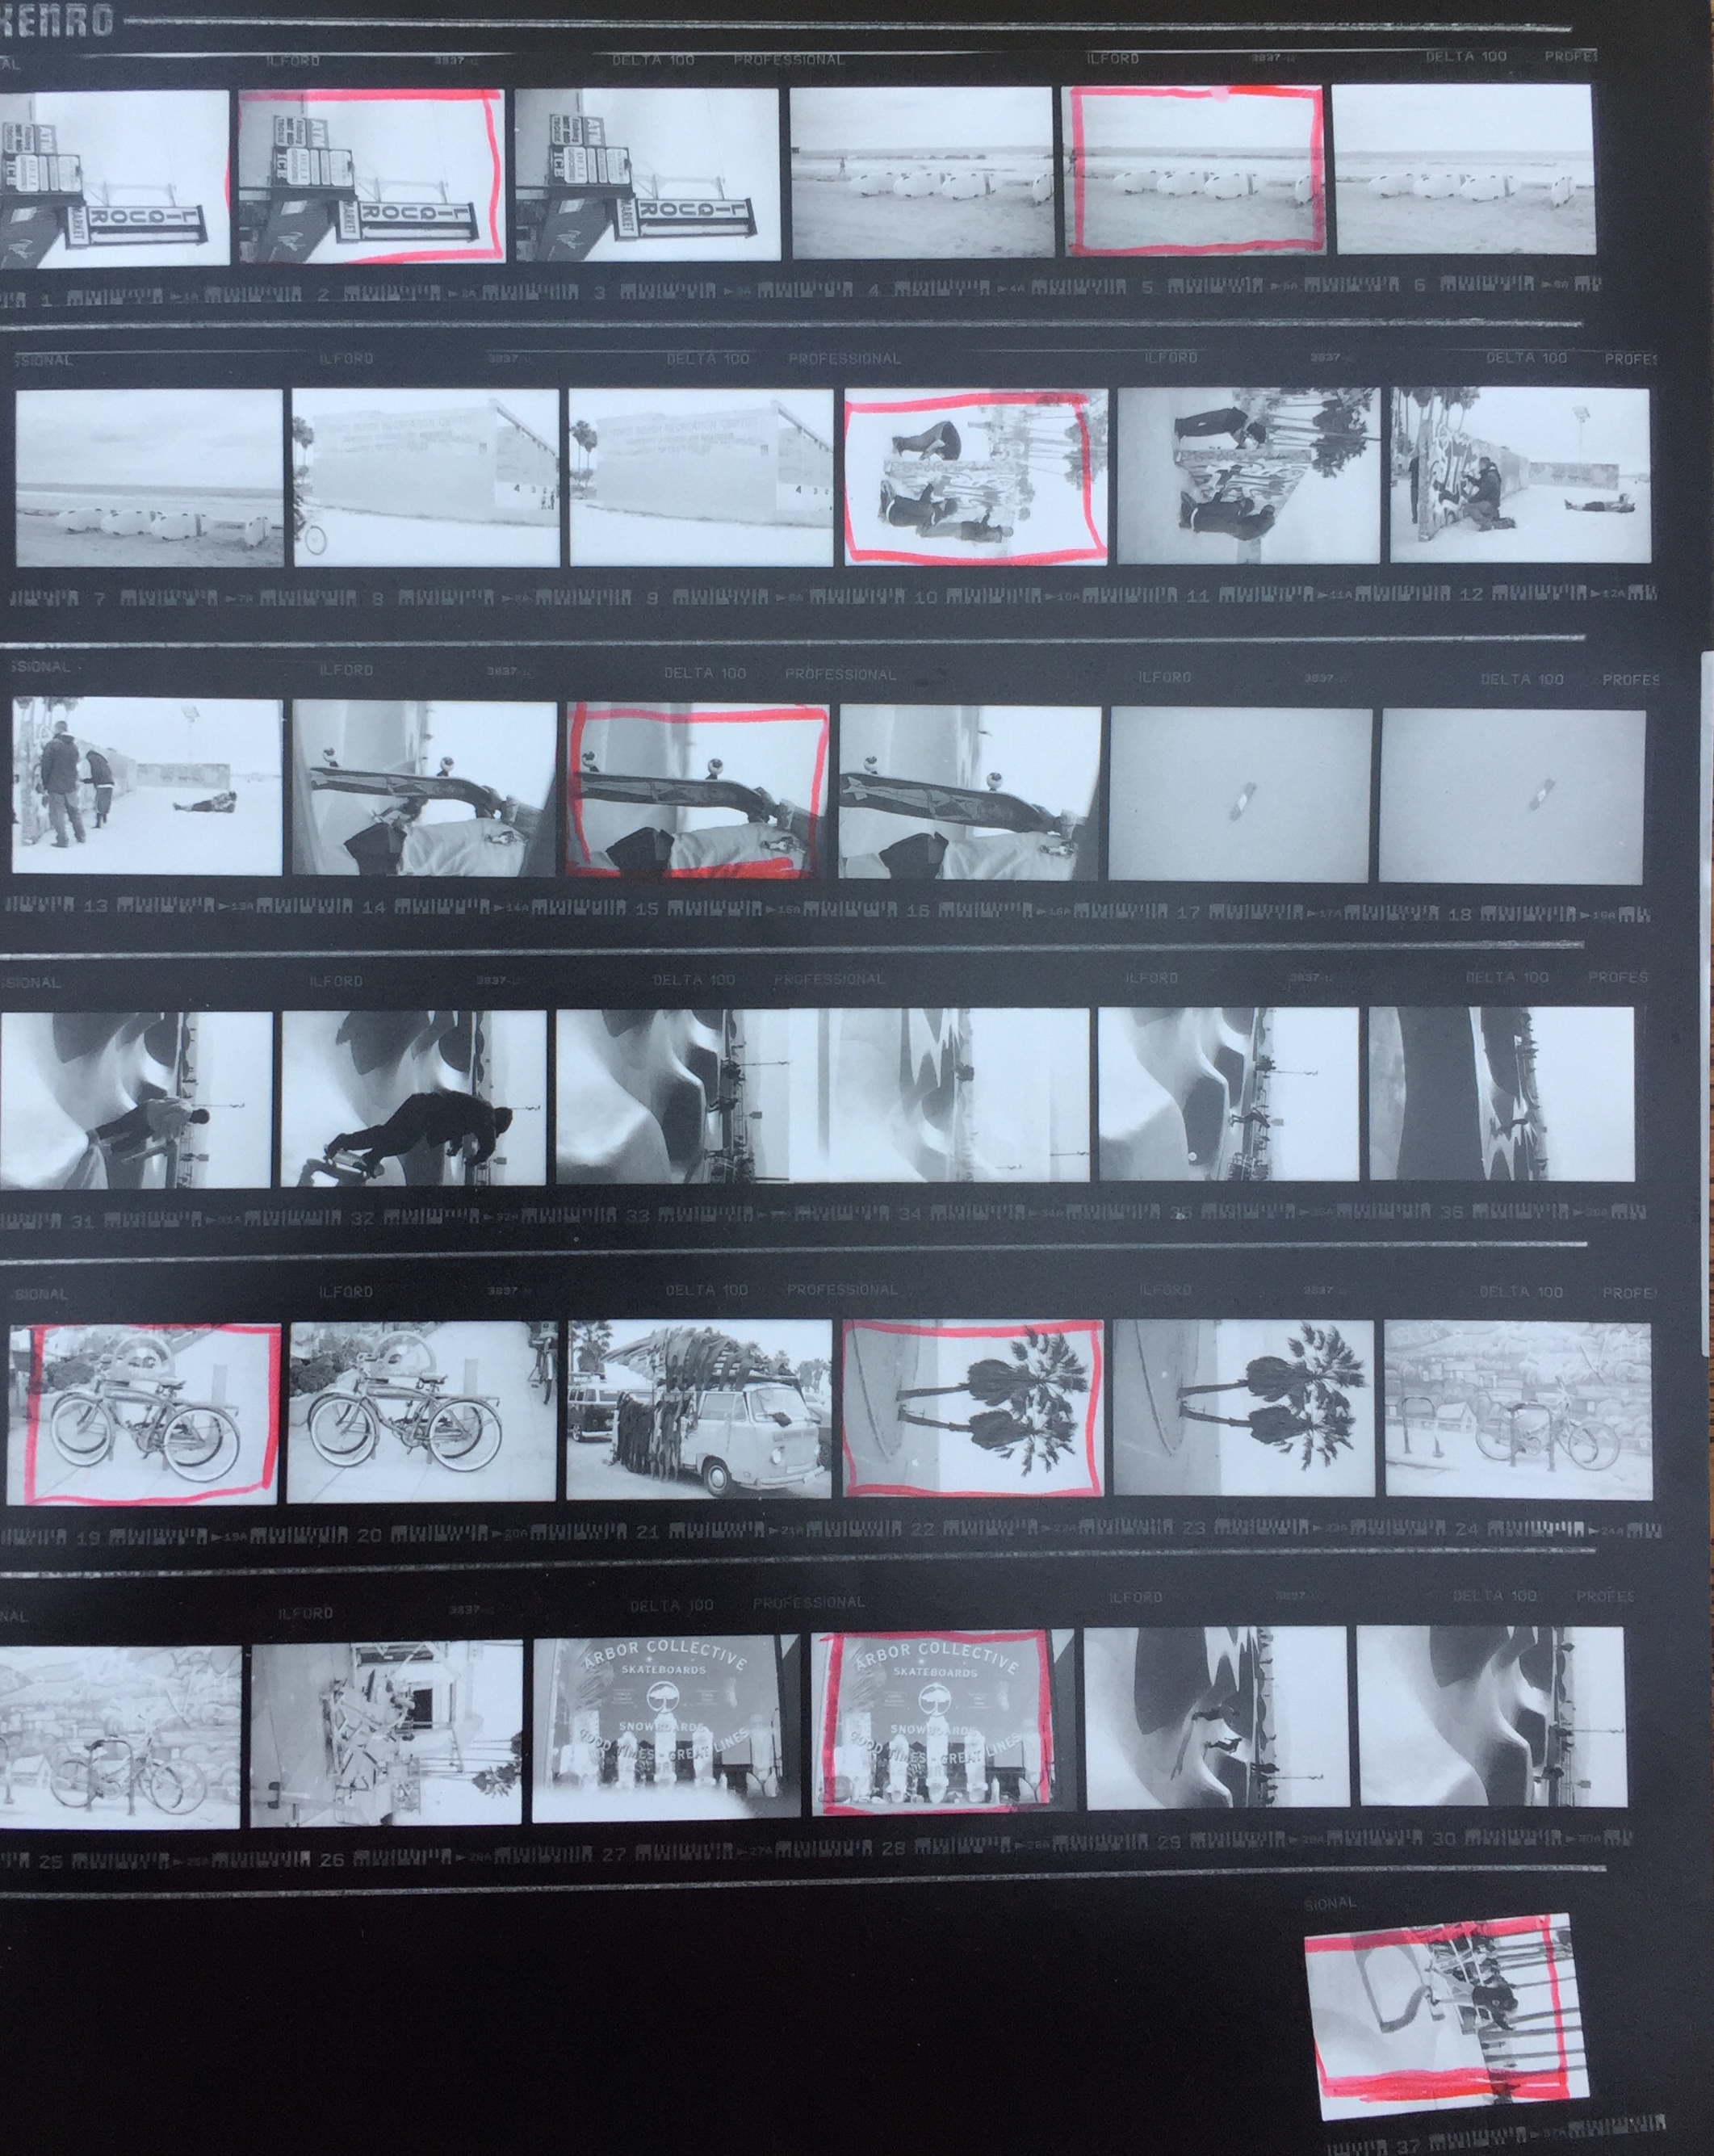
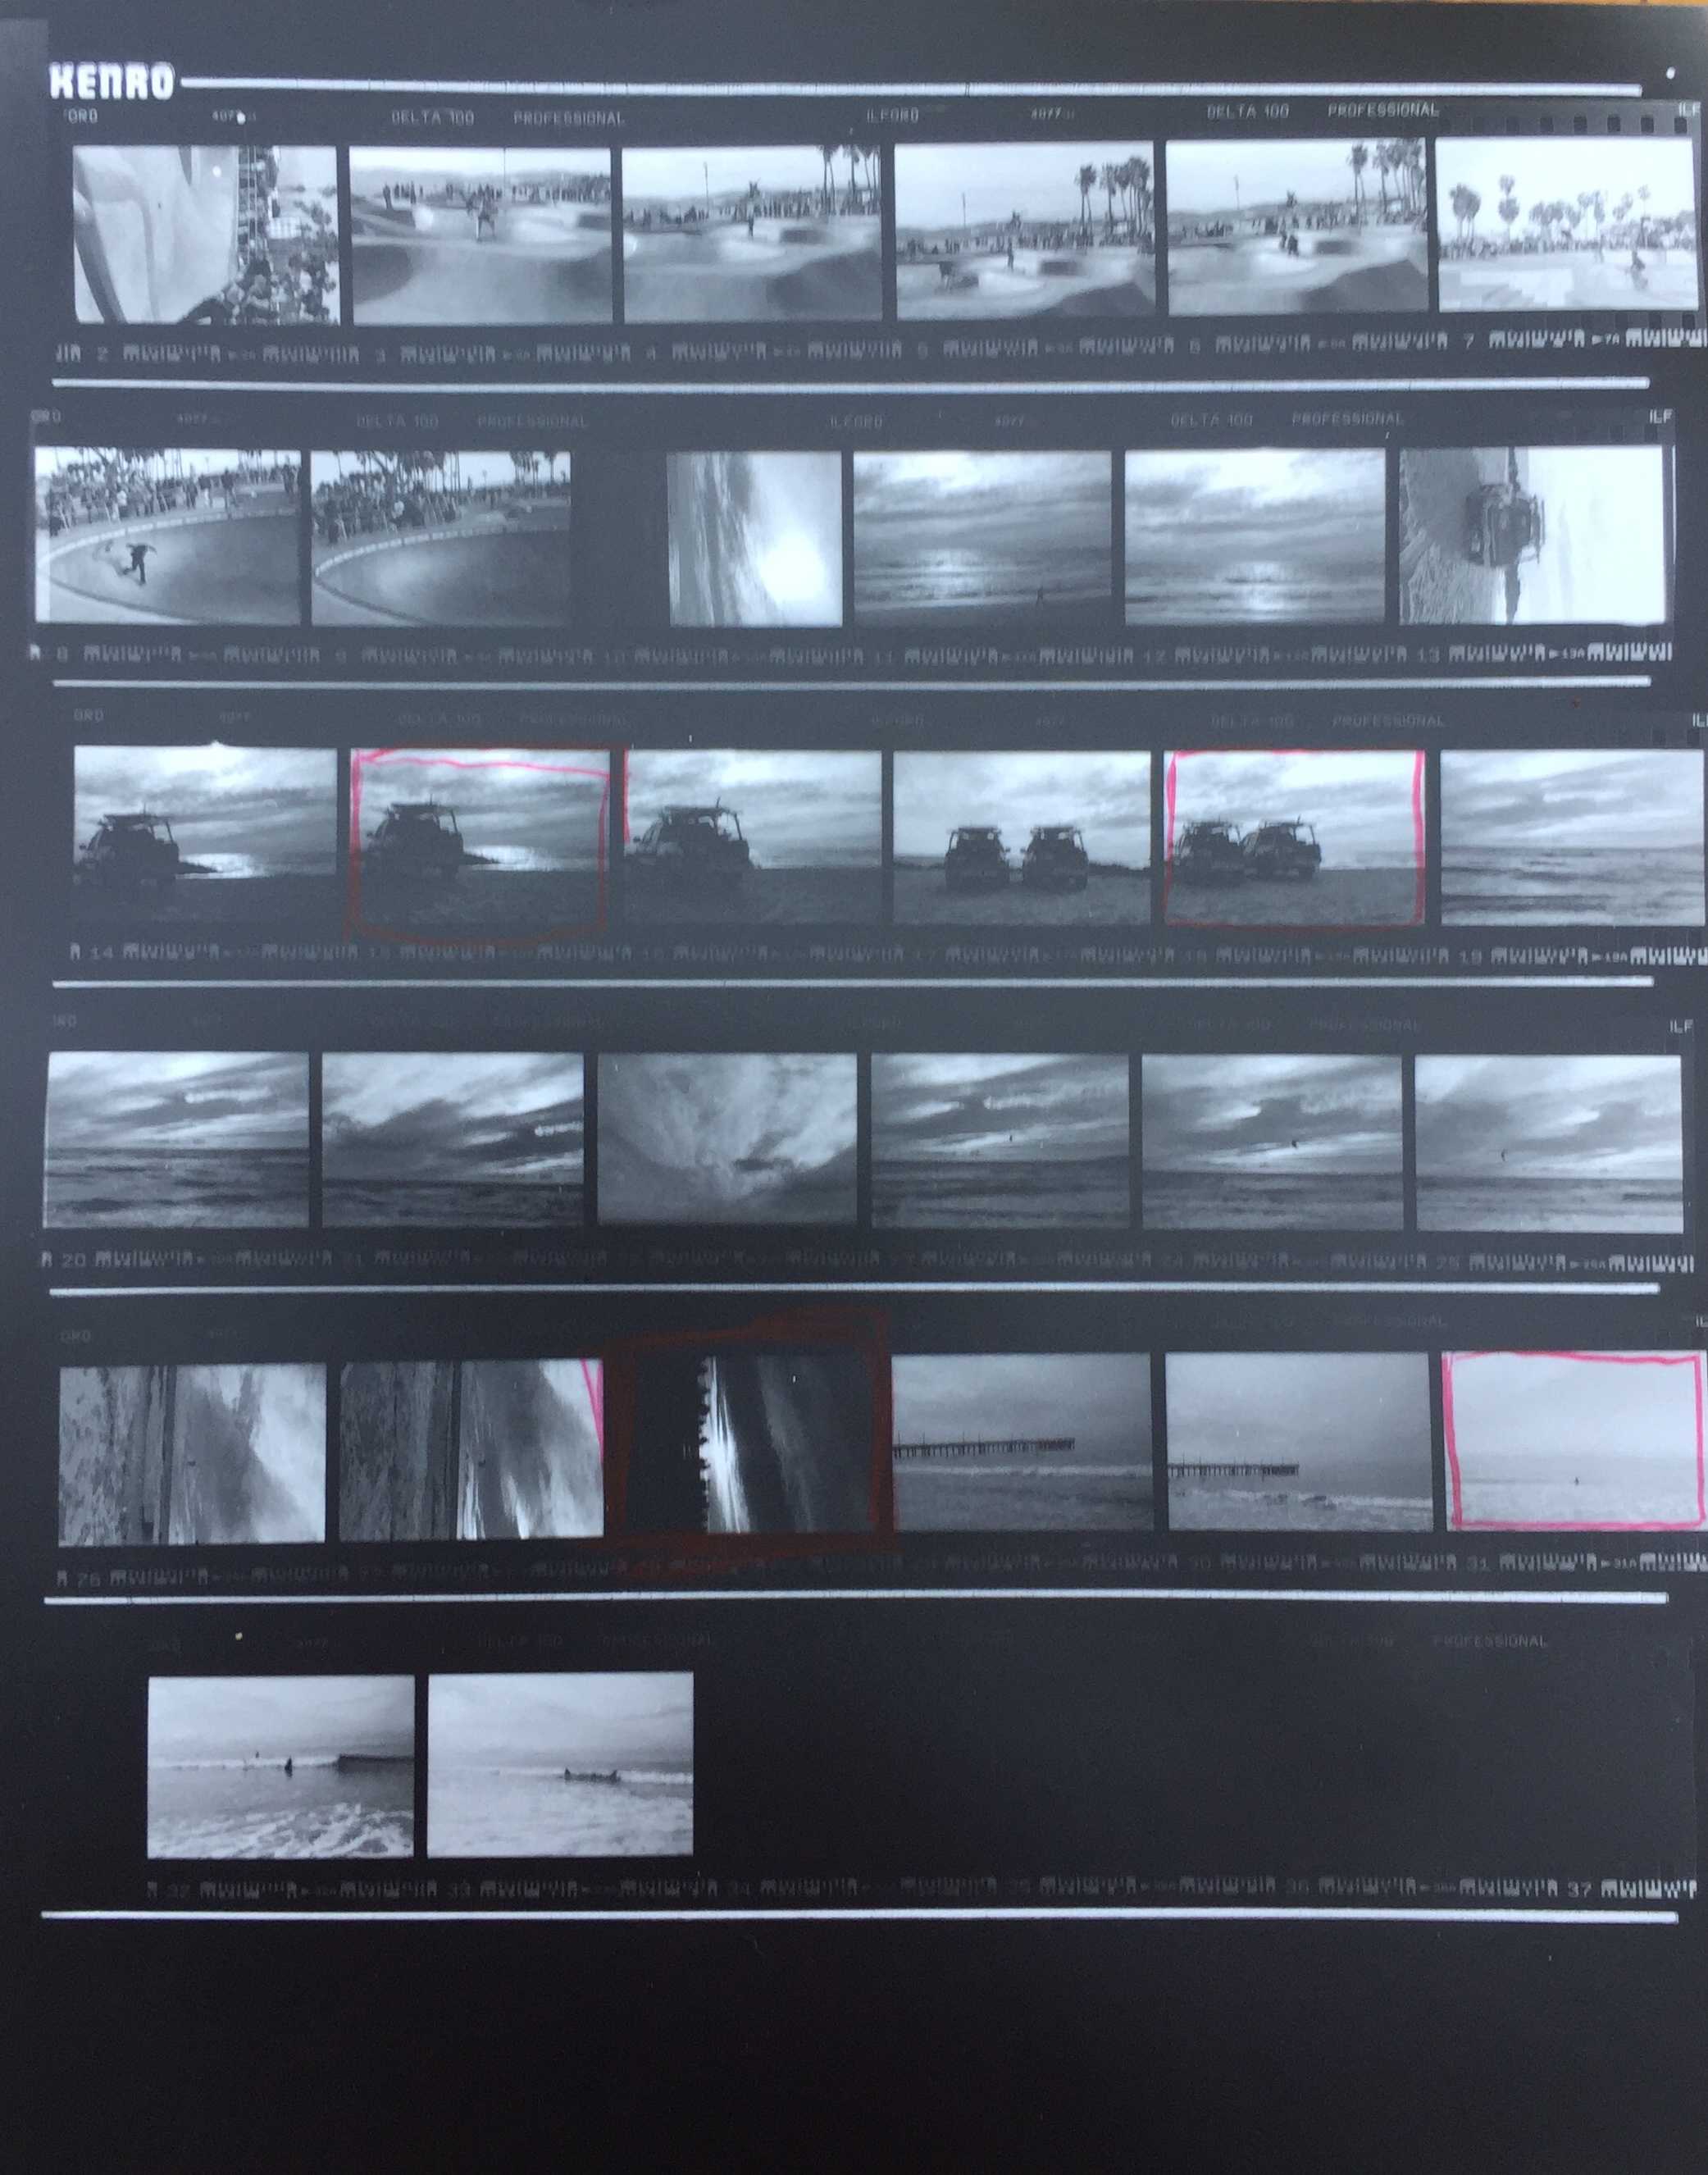
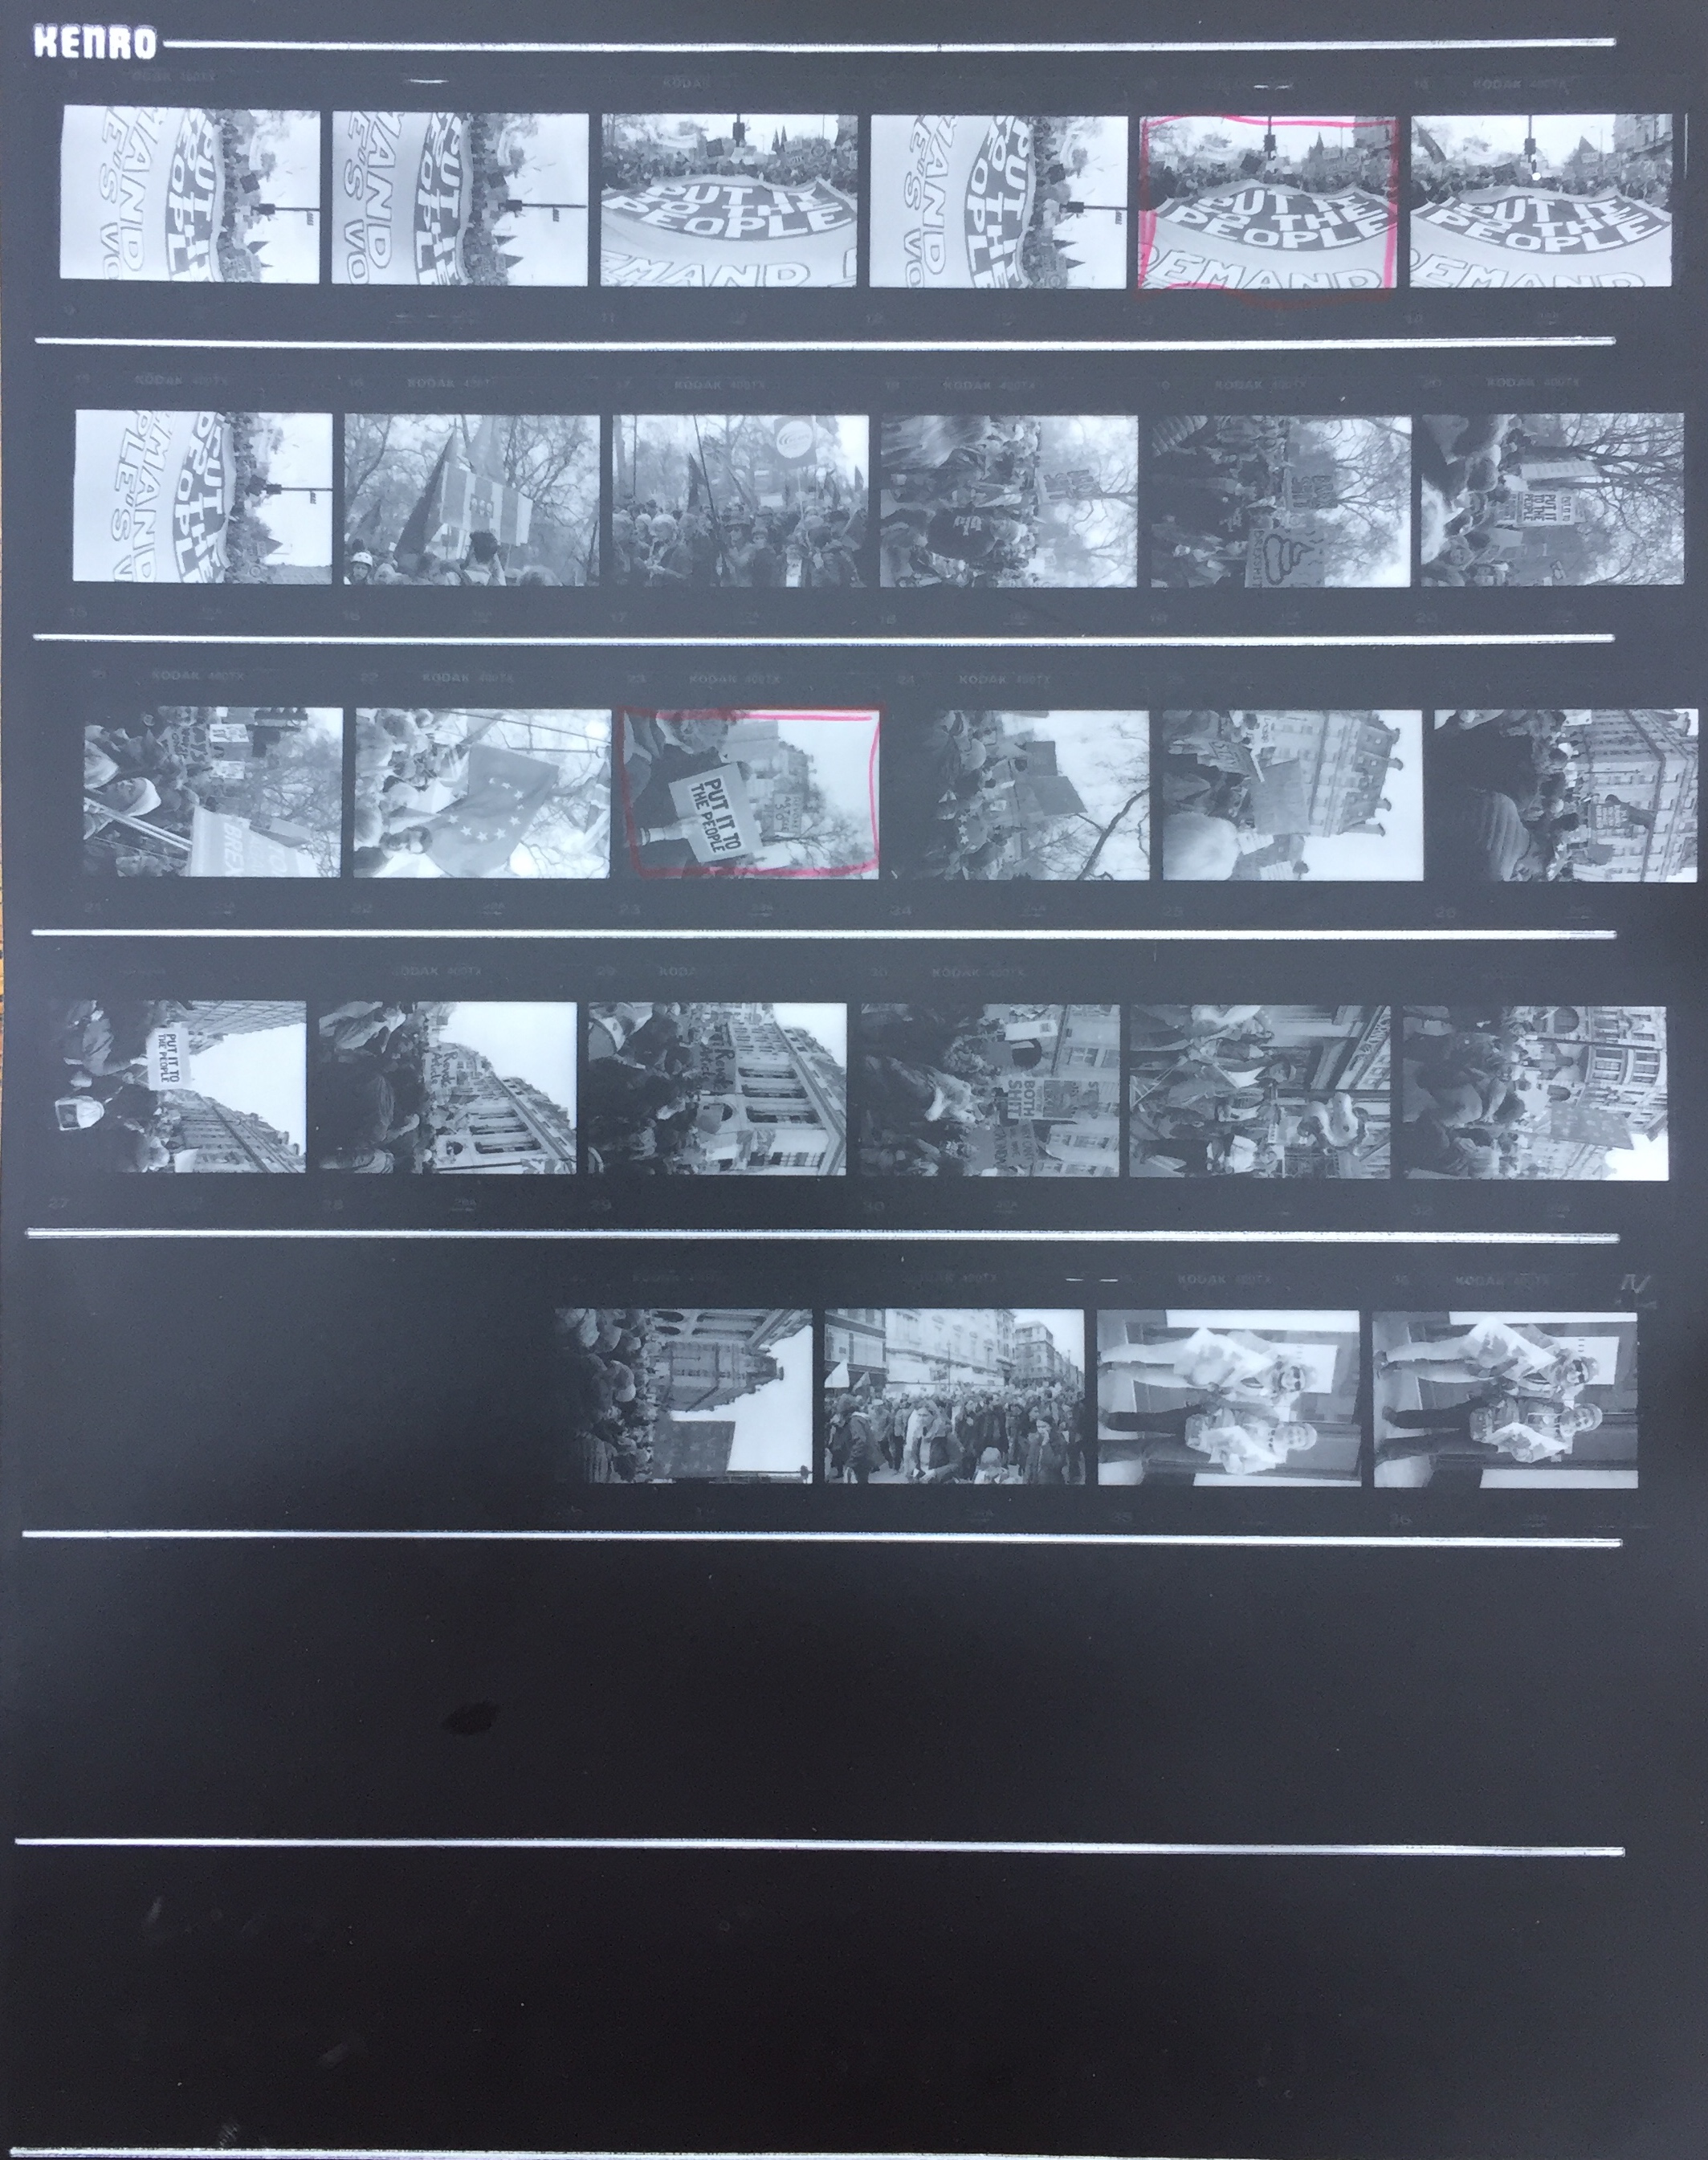
I’ve pasted a few examples below. I mark up my chosen images with a paint pen or a chinagraph (wax) pencil. This is what allows you to come straight back to your chosen negative (surprisingly useful if you have a sequence of similar images). You’ll note the film edges are completely black (that’s the mark of a proper proof). If they’re not, you’ve done something wrong! If your images are too dark, you’ve under-exposed. Too light and you’ve over-exposed.
Give it a go….you may find, like me, you never look back.